

tuXlab Cookbook
Illustrator : Leonora van Staden
Copyright © 2005 Shuttleworth Foundation
Table of Contents
- 1. Introduction
- 2. Walkthrough
- 3. Background
- 4. Getting a lab
- 5. Lab layout
- 6. Thin-client computing
- 7. Software components
- 8. Networking
- 9. Server configuration
- 10. Downloading the Internet
- 11. Open source Educational Software
- 12. Advanced topics
- 13. Problem solver
- Introduction
- Basic overview
- Troubleshooting common tuXlab problems
- Thin client stops at "Searching for DHCP"
- Thin client stops at "Loading vmlinuz.ltsp..."
- Thin clients have grey screen showing only an X cursor
- Thin client displays message "Link cable error"
- Thin client screen goes black or fuzzy at startup
- Thin client freezes / reboots regularly
- Mouse doesn't move
- Keyboard doesn't work
- Known issues
- Troubleshooting reference
- Further reading
- 14. Getting the most from your lab
- 15. End matter
- 16. Appendices
Table of Contents
If you're reading this, you're about to embark on a journey of discovery and empowerment. Welcome! Though it might seem like a uphill battle now, you'll soon be the master of your tuXlab, with a roomful of computers humming along and a community of users making them work hard.
This book is meant for anyone who would like to set up a computer laboratory according to the specifications of the Shuttleworth Foundation. This kind of laboratory --- called a tuXlab after the Linux mascot, Tux the Penguin (XXX: Tux image) --- uses only free software, is easy to administer, and makes the best use of old or obsolete hardware. It has been designed to be easy to administer, and because it is properly documented (for example, in the book you're holding now), there is a community of tuXlab administrators to whom you may turn for help if you get stuck.
Although the tuXlab project is primarily aimed at schools, tuXlabs are not only useful in a school environment. Any kind of community organisation may benefit from a secure and powerful computer laboratory, so feel free to pass on this book to anyone who can use it.
This book caters for a couple of different audiences. In the first place, the book accompanies all the tuXlab installations done by the volunteers of the Schools Linux Users Group. In this case, it serves to document what you have, and to help you understand it in order to keep it in good running order.
In the second place, the book will be sent to schools or centres that have been selected to become part of the tuXlab program, but that are too remote for the volunteers to reach in order to do the installation. In this case, you'll have to take care of it yourself, and this book is intended to guide you through this process.
Lastly, anyone with enough enthusiasm, as well as access to some old computers and the other equipment necessary, may use the book as a blueprint to install a computer lab for their community.
The book is also meant to introduce you to the concept of a computer laboratory, and to give you some insight into what it takes to run one. It provides you with the necessary background to apply to the Shuttleworth Foundation for inclusion in the tuXlabs program, laying out the requirements for participation.
If you are thinking of applying for a tuXlab, start reading at Chapter 4, Getting a lab to see what it takes to get involved in the tuXlab program.
If you're preparing to install your own tuXlab, turn to Chapter 5, Lab layout to start readying the space.
If you already have an up and running tuXlab, you'll want to skip to Chapter 7, Software components to find out about everything your tuXlab has installed.
The ultimate aim of the tuXlab project is empowerment: to place state of the art Information and Communication Technology within the reach of everyone. This is in line with the Empowerment Charter for the ICT Sector, an industry-driven document being put together by major stakeholders in the ICT sector, together with valuable input from government represented, in part, by the Department of Communications and the Department of Trade and Industry. However, computers and networks are complicated things, and simply knowing how to ask the right questions can be very hard if you don't already have a lot of experience.
This book is intended to help you to be self-sufficient, and to enable you to ask for help effectively. It gathers together information about all the components that make up a tuXlab, and it tells the story behind the global, grass-roots free software movement that created all the software, millions upon millions of lines of code, that make it work.
The book sketches a big picture, relating the individual tuXlab to all the other tuXlabs out there, and to the wider free software community, and is intended to foster good communication among all participants in the project.
The tuXlab project has its roots in the Shuttleworth Foundation's commitment to improve the standard of education in South Africa. This is a huge task with many facets, and just putting computers in schools is not nearly enough. The one critical factor in education is the people involved: the teachers and the learners they have to educate. For computer labs to make a difference, the people who use them must understand them and be able to use them for anything that they can imagine. They must be able to take ownership of the computers and the software that they run, and to create new learning material to share with each other and with society as a whole.
While an understanding of computers and information technology is critical in our modern global society, they are not a sufficient goal in themselves. There are many other fields of knowledge that beckon to be explored, and to be discussed and debated with other people. However, publishing and distributing books on paper is expensive, and unless you are in a big city with the means to travel around easily, it is awkward and costly to take part in the global conversation. Information technology offers us a chance to leapfrog these problems by providing access to vast resources of texts, curricula, art and music via the Internet, and allows us to stay in touch by electronic means, even in remote areas.
Without some degree of mastery of technology, it is easy to miss the debates of real importance on the Internet. To understand legislation concerning intellectual property, access to information and privacy issues, it is crucial to understand what the technology offers and how it differs from the possibilities of the past. In a sense, this is the real meaning of the digital divide: if you don't understand how computers and networks can be used, you can starve even in the midst of plenty of conversation and information.
To accomplish these objectives of social innovation and empowerment, and to further the uptake of technology in South Africa, the Shuttleworth Foundation launched the tuXlab project. The aim of this project is to establish a national network of computer laboratories based exclusively on open source software. The Shuttleworth Foundation strongly believes that open source software should be the preferred choice of software for schooling in South Africa. Open source software provides users with freedoms not obtainable from proprietary software. This includes the freedom to obtain, use, modify and distribute the software.

The Shuttleworth Foundation believes that the use of open source software will provide effective and economical access to information and communication technology.
In 2002 the Foundation started to actively promote the use open source software as a computer lab solution for schools. The Foundation funded several projects to establish open source based computer labs in schools, as well as an internally initiating a pilot to prove the effectiveness of open source software as a school computing solution. The Foundation also initiated a project to facilitate the involvement of volunteers in refurbishing computers and establishing open source learning centres.
Based on the success of the pilot and volunteer project, the Foundation extended the pilot to establish a further 80 open source learning centres in the Western Cape. This goal was reached in November 2004.
Both primary and secondary schools are being targeted. In order to maximise the impact of the program, schools are selected in clusters. Through clustering, schools are able to plan the use of the centres together, and they can share resources and community support. The Shuttleworth Foundation believes that clustering is the best method of ensuring that schools remain self-sufficient in terms of support in the future. This is supported by the Computers in Schools survey of 2000, which states (my emphasis):
Experiences from other countries, whatever their stage of development, show that factors which accompany the successful implementation of ICTs in schools are networks of connectivity and structured and continuous programmes to train teachers to use the new technology for educational purposes. | ||
| -- Computers in Schools, 2000 | ||
Within a cluster, schools are selected based on criteria set by the Foundation. At a very minimum, these criteria will include the availability of a secure computing environment, guaranteed commitment of the school (including governing body) to the project, as well as proof of comprehensive plans to introduce the Shuttleworth tuXlab into school activities. Additional criteria may be set for each cluster.
Within each school, a 20 to 24 seat tuXlab is established. Refurbished hardware is used for the workstation computers, and new hardware purchased for the server. The Shuttleworth tuXlabs are implemented using a thin-client paradigm, with GNU/Linux used as the primary operating system and open source applications wherever possible.
The Shuttleworth Foundation requires that staff and students participate fully in the installation process. In accordance with its mandate, the Foundation adopts a skills transfer methodology during installation --- all participants will receive the necessary skills to establish and maintain further Shuttleworth tuXlabs. The Foundation will also facilitate the involvement of external volunteers, such as students, throughout the entire process.
Throughout the course of this program, the Foundation intends to partner with as many organisations as possible. On its own, the Foundation does not have the resources and infrastructure to take the tuXlab program national. Through partnership we hope to maximise the impact of the program, develop skills, reduce costs, grow resources, and hopefully facilitate the adoption of the program within other contexts.
In 2005, hundreds of tuXlabs are being installed throughout South Africa in partnership with local organisations and user groups. The project is also being launched in Namibia, and reports of roll-outs overseas (such as a large-scale project in Azerbijan! (XXX: link)) have also come in.
Table of Contents
Maybe you've just taken acceptance of a brand new tuXlab, or perhaps you're just dreaming about when it will all be done. Whatever the case may be, let's take a walk through the completed lab to see how everything fits together.
Every tuXlab consists of a room where people may come to use the facilities of the lab.
The room is secured with a gate and burglar bars on the windows, and the really expensive components of the tuXlab are locked away even further, in another room or in a cage. [1]
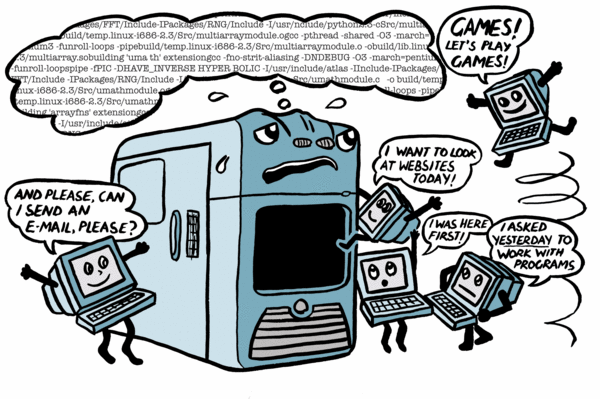
The room provides a comfortable space to work in, with desks at the right height for the learners at the school, and with enough plugs and cables for all the computers. All the users of the tuXlab may sit down at any of the workstations and log in, to find their working environment just as they left it, even if they're using a different computer now.
A tuXlab usually contains between 20 and 25 workstation computers, although you may add workstations if you already have some computers, or if you can get donations. These workstations are connected to a server computer by way of a highspeed network.
The workstations are where the rubber hits the road, so to speak. They are standing out there on the desks, and everyone who uses the tuXlab is constantly using their keyboards and adjusting their screens, and so they do undergo some wear and tear. Because they are intended to be accessible to use, they are not that easy to secure. If something is locked away, it's hard to learn how to use it. To deal with this state of affairs, tuXlabs are designed so as to make the workstations as cheap and as easy as possible to replace. They should be completely interchangeable, and they store nothing: no documents, and no information about any user.
The server actually does all the work in a tuXlab. If the server goes away, the workstations will just stand around scratching their heads, like bees when something happens to the queen bee. Whatever you see when working at a tuXlab workstation has been sent to the workstation by the server over the network. All the documents you save, and all the information regarding users, everything is stored on the server.

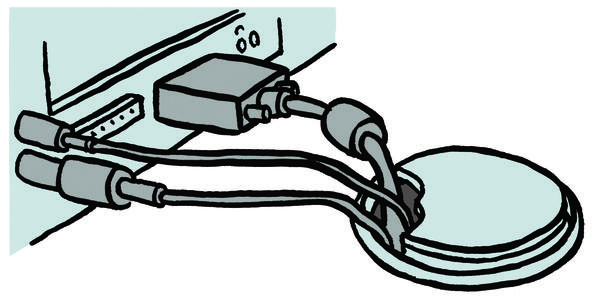
The third critical component of a tuXlab is the computer network that connects all the machines in the room. If you're looking at a finished tuXlab, the network cabling shouldn't be terribly obvious. However, every workstation has a Ethernet cable plugged into it, and you should be able to see the switch cabinet where all the cables go. However, if you were to look inside the trunking running along the walls or under the desks, you would see that there is an Ethernet cable for each and every workstation, connecting it to the network switch. The tuXlab server is also connected to the switch by a flylead.
In this configuration, it is as if every workstation in the tuXlab is connected directly to the server. The switch itself is transparent to the network. It sees to it that network traffic from the server is sent as directly as possible to the workstation for which it is intended. From the perspective of the computers, it looks as though they're all connected directly to each other.
If anything goes amiss in a tuXlab, there's an even chance that it may be a problem with the network, since, from the workstation's point of view, a broken network is just as bad as a broken server. It can't do anything in either case.
Table of Contents
A tuXlab consists of computers, a lot of cables, a room to put them in, and software to make the computers do something useful.
Most of the computers are client workstations. They're the computers that are used every day by the lab users. One or two computers, however, are servers. They are locked away and normally only accessed via the network. The classroom server is by far the most powerful computer in the lab, and does all the work.
All the equipment in a tuXlab is networked. For this, all the computers need a network card, which is connected to a network switch using a length of cable.
Lastly, the computers need software to run. The software falls roughly into two categories: the operating system software, and applications. All the computers in the lab run the Linux operating system (the workstations fetch their copy from the server upon startup). This enables the server to display the applications it is running for all the workstations on the screens of the workstations themselves, using the X Windows system, the graphical windowing environment used by Linux.
The applications installed in a tuXlab are focussed on an educational environment, and include software that is essential for general computer literacy such as word processors, spreadsheet and web browsers, as well as educational software that allow learners to practice skills (e.g. typing, arithmetic) and knowledge (e.g. spelling, geography). See Chapter 11, Open source Educational Software for some examples. Besides these, a tuXlab contains a great variety of programming languages, tools, texts and examples that can be used to teach programming and to study how existing programs work, all the way from first principles to systems architecture. Nothing is proprietary: you may examine the source code of every component in the system.
In the following sections, we'll look much more closely at how these parts fit together.
In the earliest days of computers, a whole machine was built to do only one thing, for example numerical integration. There was no clean distinction between hardware and software, as aspects of the program might be reflected by physical switches and jumpers set on the machine itself.
As computers became more general, the same computer could be programmed to do many different things. All these programs, however, would still have to deal with the hardware aspects of the machine, writing to the printer, reading from the magnetic drum memory, and so on. Since these jobs needed to be done over and over and over again, the bits of code that dealt with them could be shared among all the programs that run on that computer. This shared code, the code that handles the basic tasks any program needs in order to run, was the beginning of operating systems.
Today's operating systems are complex, sophisticated systems, that can schedule many different programs to run at once, and that provide such a comprehensive range of services that many programs can be compiled to run on many different operating systems, regardless of the variations in the underlying hardware.
An operating system (OS for short) is the most basic layer of the software, and if your computer is switched on, the operating system kernel is the one program that will always be executing. It provides a framework for all the subsystems that make up the computer.
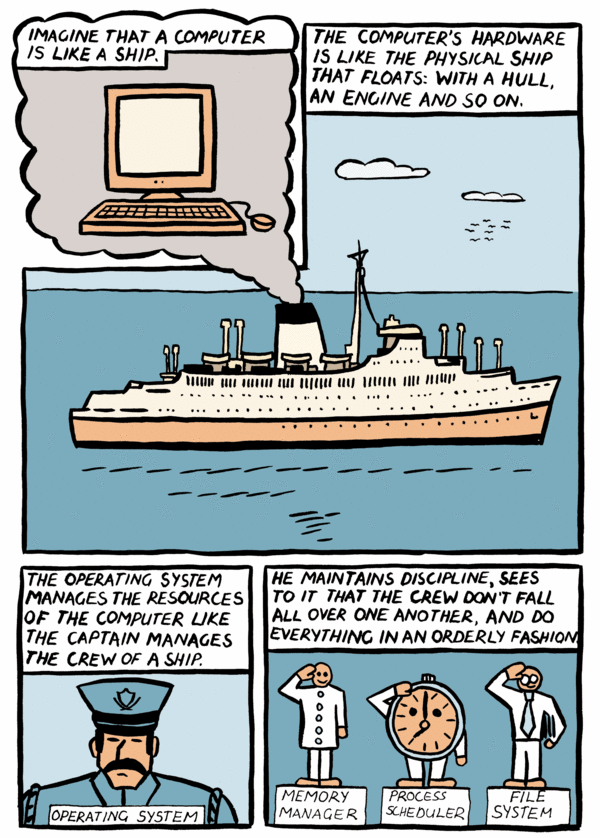
Imagine, for a moment, that a computer is like a ship. The physical hardware is the steel or wooden hull that floats. The operating system is like the officers of a ship, and its subsystems are like the captain, the first mate, the engineer, the cook, and so on. They see to it that the engine is running and that the ship is on an even keel.
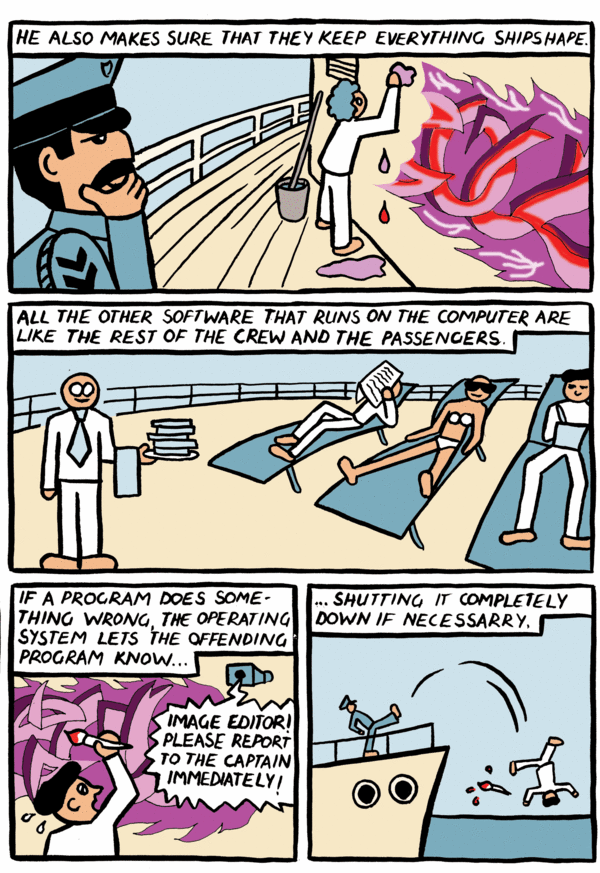
All the other software that runs on the computer are like the rest of the crew and the passengers. The operating system manages the resources of the computer like the captain manages the crew of the ship. He maintains discipline, sees to it that the crew don't fall all over one another, do things in an orderly fashion, and keep everything shipshape.
If a program does something wrong (such as writing to memory that the operating system is using for something else. In the ship example, this is like making a hole in the hull!), the operating lets the offending program know, shutting it down completely if necessary (it gets thrown in the brig).
Linux is an operating system consisting of a kernel as well as all the hundreds of libraries, tools and utilities that make it usable as a computing environment. The kernel was developed by Linus Torvalds, using the tools and utilities of the GNU project. Together, the whole system is called GNU/Linux. Some other common operating systems are the Unix family (including members like Linux, BSD, AIX, Solaris, HP-UX, and others); DOS; Microsoft Windows; Amiga; and Mac OS. An upcoming variety of operating systems, such as Symbian and PalmOS, run on cellphones. There are special-purpose operating systems wherever you look, far more than you would have suspected.
Linux is Free Software. So, not only is it OK to make copies of Linux and give them to your friends, it's also fine to fix things while you're at it --- as long as you also freely provide your modified source code to everyone else. When you're doing this, you're not just providing a freebie to the people who get your fixes: you're also exercising your right to influence Linux, and to change the way that you want it to work. In return for this right which has been granted to you, you must allow those who come after you the same freedom in making use of your work. The issue is freedom, not price.
Charging for Free Software
How can people build businesses on software if everything must be given away? Actually, you're welcome to ask money, but then people are paying for your expertise and services, e.g. assurances of support that you may give them. You may also provide added value, such as attractive packaging and shipping. Only the source code itself must be available at nominal cost.
No one company or individual "owns" Linux. It was developed, and is still being improved, by thousands of programmers all over the world. Some are supported by businesses that make money from their work, and some are volunteers who like to help people. Some are scientists who need computers to get their work done, and who find it convenient to use Linux because they can easily adapt it to do exactly what they require to get their research done.
Our consumer culture puts huge stress on having "the best". Usually this means wearing some fashionable brand of jeans, or driving a fancy car. Obviously this is a very superficial measurement, and we have to look deeper when trying to compare operating systems.
It's important to remember that computer science is relatively young. I don't think that any operating system has been in continuous use for longer than a single human lifespan. At the dawn of the computer age, there was a great explosion of diversity, like in the Cambrian period in prehistory, when different designs and architectures proliferated. This was succeed by a period of consolidation, with the result that today, even though the details "under the hood" may be very different, a great deal of consensus has emerged about the types of services an operating system should provide. [2]
At the moment, the operating systems you're likely to encounter on desktops are to some extent interchangable. Linux, Macintosh OS X and Windows all implement POSIX to some degree. Software that was written to make use portable use of the operating system's services may be compiled to run on all of them.
These operating systems can all do the same jobs, and you may develop skills that apply to other operating systems on any of them. Therefor there is no quick, objective answer to the question as which one is "best". You have to forget that one, and ask a better question: "Which operating system is best for me?"
Well, of course that depends on who you are and what you need it for. If you're interested in tuXlabs then you probably don't have lots and lots of money, and you're probably interested in learning: learning about computers, yes, but also education in general. When answering this question for yourself, here are two things to keep in mind:
How does it impact the world I live in? . The software you choose can influence many aspects of your life. For example, you need to ask: "Who controls the technology?" If you teach yourself to use a product that belongs to some company, you'd better hope that they don't go out of business.
Governments are also starting to use computers for tasks such as counting votes. During the previous two elections in America, there was great controversy about the results turned in by Diebold's vote counting machines. Diebold controls the software, and expect voters to take the trustworthiness of their software on faith. For matters such as this, democracies in the digital age must use open source software.
Current technical merit is only one measure . Even if something is imperfect now, if you can get at it, you can make it better and learn in the process.
For example, the open source program called the GIMP (the GNU Image Manipulation Program) goes head-to-head with Adobe Photoshop. At the moment, Photoshop still comes out pretty far ahead, but it has been under continuous development for a decade or more. Does this mean that aspiring designers should turn their back on the GIMP? If they do, they lose the things that the GIMP already gives them which Photoshop doesn't, such as the ability to write extensions in a variety of high-level programming languages, and to build on the contributions of the entire community of users.
In the following text, you'll read about a number of different distributions, e.g. Debian, K12LTSP and RedHat Fedora. This is a term that emerged from the open source way of gathering and organising software for sharing: a coherent, well-maintained, up-to-date collection of software (especially on the scale of an operating system) is called a distribution.
As you saw above, Linux is the source code of an operating system being written by hundreds of volunteers who pursue their own goals and interests. It uses tools from other projects, such as the GNU project, and is used on a very wide range of machines, for widely varying goals. From this, you may imagine that it is a hugely complex system, and you'd be right. Assembling just the subset of code that is relevant to you, and compiling it to run optimally on the hardware that you happen to have, is a major undertaking requiring deep skill and experience. Keeping your system up to date with changes in disparate parts of the whole is a major undertaking in itself.
In order to have a manageable system, well-understood and reasonably easy to customise and keep up to date, groups of users began to band together to collect just the right combinations of software, and to coordinate this job. Some people built their business around the process of gathering, labelling, testing, documenting and marketing free software, for example RedHat and SuSE. Some communities assemble distributions that conform to their ideals; Debian, for example, operates in accordance with a Social Contract which maintains the same principles of good husbandry and mutual cooperation that prompted Richard Stallman to found the Free Software Foundation.
tuXlabs and Wizzy actually make use of no less than four related distributions.
The classroom server runs a modified K12LTSP distribution, and
the Wizzy server is based on Whitebox Linux.
K12LTSP, in turn, is based on RedHat Fedora;
and Whitebox Linux is based on RedHat Enterprise.
In part, the reasons for the variation are historical: the Wizzy solution was developed independently of the tuXlab project.
The idea of free software, with source code that could be shared by everyone, started in academia. In America, it was Richard Stallman at MIT, the Massachusetts Institute of Technology, who started the ball rolling, but the person who accidentally turned it into an avalanche was Linus Torvalds, a Finnish university student.
At MIT, Stallman had been part of a community of programmers that came to an end when their work was commercialized and access to the source code was restricted. To Stallman, this felt like having the air he needed to breathe cut off. Because Stallman believed strongly that programmers should be able to help one another by sharing their source code, he set out to write a complete free operating system. He began systematically, though, first setting out to write all the supporting tools that an operating system requires to work. This is a mammoth task, and in fact they're still busy refining better and better tools.
Linus Torvalds, in Helsinki, wasn't burdened with any such a sense of responsibility or thoroughness. He just wanted to make the most of the PC he had at home, which had an Intel 80386 CPU. The 80386 contained a memory management unit, which was big news at the time. The operating systems he had at his disposal didn't take advantage of this and he dearly wanted to use it, and so he started to write his own operating system. To do this, he used many of the tools created by the GNU project. After months and months of steady work, he released a very early version of the kernel that became known as Linux to the internet. To his surprise, other people started sending him fixes and improvements for his kernel, and eventually he found himself managing and coordinating a global community of programmers. All of them were using and improving Linux, and building on each others' work.

In a sense, the free software community that Stallman had known at MIT had risen anew, on a global scale. Their rallying point was a system made up of the Linux kernel, and the GNU development environment.
The first one to think of a name for the kind of software that could be shared without restrictions on how you could use it was Richard Stallman. He called it Free Software, because he wanted to emphasize the freedoms that he valued highly enough to dedicate his life to writing a free operating system.
The Free Software Foundation supports the freedoms of speech, press, and association on the Internet, the right to use encryption software for private communication, and the right to write software unimpeded by private monopolies. Stallman formulated a license, the GNU Public License, which uses the mechanism of copyright to protect these freedoms, and to add the responsibility of passing them on to other users of the software.
When Linux started to be noticed by business, and when it began to be marketed as a serious IT platform, this emphasis on freedom made some people uncomfortable. The argument was that people don't run their businesses in order to advance someone's freedom of speech --- they run their business to make money!
Instead of emphasizing the freedom aspects so dear to Stallman's heart, more emphasis was placed on the fact that everyone had access to the source code of Linux. The programmer and writer Eric Raymond wrote some influential papers in which he argued that the Linux style of community development produced better software than the proprietary alternative. The choice for open source software could be made on a purely pragmatic basis. The critical factor, in his view, was the availability of the source code, and therefor he coined the term Open Source to describe this kind of software.
The contrast may be summed up in the sentence: "Open source is a development methodology; free software is a social movement." FSF
Neither one of these approaches encompass the whole truth, they simply emphasize different aspects of a rich sphere of human endeavour. The pragmatic approach taken by tuXlabs in the selection of software for inclusion leans more toward the open source side of the debate, but the Shuttleworth Foundation's goal of "social innovation" is in line with the FSF philosophy.
Various other streams exists. The BSD license of the FreeBSD project, for example, does not specify the responsibilities of the GPL, and allows code under the BSD license to be incorporated into proprietary software. For many years, for example, the Windows TCP/IP stack (see the section called “TCP/IP”) was based on BSD code right up to the period of Windows 2000 --- perhaps it still is?
As the open source culture matured, the principles of mutual education, self-sufficiency and sharing were applied to many things besides software. One of the first projects to bring the wider world of culture into the open source community was Project Gutenberg, a project to make available as many as possible public domain and freely redistributable texts at no cost. Due to recent changes in American legislation (which enables copyright holders to keep works out of the public domain forever), this essentially means works created before 1923. At the moment, there are more than 13,000 books available for download.
Another open source project is the Wikipedia, an online encyclopedia read and edited entirely by volunteers. The English edition, started in 2001, already has almost half a million articles. If your tuXlab includes a Wizzy internet server, the entire Wikipedia can be made available on the tuXlab network.
A law professor at XXX, Larry Lessig, noticed the need to apply the open source principles of collaboration and sharing in other domains besides software, and set about crafting a flexible set of licenses that could be used to bring music, books, movies and educational material into the open source world. Since his project has as a goal the re-establishment of a commons, a area for the use of the community as a whole, to replace the endangered public domain, these licenses are called the Creative Commons licenses.
There are many reasons, but I'll mention only one. Far more expensive than the recording of a song, or the writing of a book, is the task of promoting, printing and distributing it. Unless this task can be handed over to everyone who reads or listens, only large media companies are able to afford this cost. A creative commons license allows authors to publish work that the media companies are not interested in.
Free Software can be a valuable resource in education, and can also promote the values of the GNU project, namely freedom and cooperation, in schools.
There are general reasons why all computer users should insist on free software. [3] It gives users the freedom to control their own computers --- with proprietary software, the computer does what the software owner wants it to do, not what you want it to do. Free software also gives users the freedom to cooperate with each other, to lead an upright life. These reasons apply to schools as they do to everyone.
But there are special reasons that apply to schools.
First, free software saves money. Even in the richest countries, schools are short of money. Free software gives schools, like other users, the freedom to copy and redistribute the software, so the school system can make copies for all the computers they have. This is essential to help close the digital divide.
Secondly, schools should help learners to build a strong society after they leave school. They should promote the use of free software just as they promote recycling and protecting your environment. If schools teach learners about free software, then they will use free software after they leave school. This will help communities to be more self-reliant, and will make them less dependent on big corporations who repatriate their profits to other countries.
Thirdly, free software permits learners to find out how software really works. They can go and look at the source code to find out how the operations they use were implemented, and experiment by changing it.
Proprietary software rejects their thirst for knowledge: it says, "The knowledge you want is a secret --- learning is forbidden!" Free software encourages everyone to learn. The free software community rejects the "priesthood of technology", which keeps the general public in ignorance of how technology works; we encourage students of any age and situation to read the source code and learn as much as they want to know. Schools that use free software will enable gifted programming students to advance.
Here are pointers to a few of the organizations and projects that work to further the use of free software in education:
The Debian Jr. Project is a custom Debian distribution. It aims to make Debian an OS that children will want to use, by studying the needs expressed by the children themselves. Their initial focus is on children up to age 8. Once this goal has been accomplished, their next target age range is 7 to 12.
Tux4Kids provides some great software packages for Debian Jr.
DebianEdu is about improving Debian to make it the best distribution for educational use.
Because they believe that free and equal access to information technology is important in modern society, the Organization for Free Software in Education and Teaching is actively promoting and developing free software for schools.
SchoolForge is an umbrella organisation or a communication channel for different groupings with the mutual goal to advance open resources at school.
The Open Source in Education Project (OSiE) supports and advocates the use of GNU/Linux systems in the UK.
This is just one example of a local project. Others exist in Germany, Italy, Latvia, Argentina, and many other countries across the globe.
Great, now we know what we have. What can we do with it? Three things:
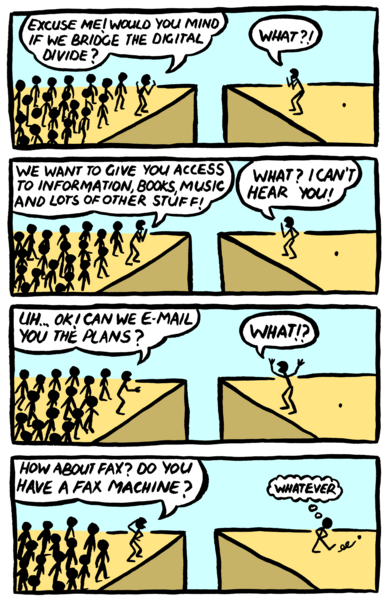
We can start bridging the Digital Divide.
A tuXlab can provide access to information, books, music, news, and myriads of other resources. It can also provide new ways to communicate with your peers, near and far, and open channels of communication to organisations that may be hard to reach because they are far away or widely distributed.
In order to manage this, we must build something sustainable, unbreakable and flexible. Instead of leaping ahead, for example by accepting an expensive lab that we cannot maintain, with proprietary software that we cannot study, we must build steadily from the ground up, so that we have a foundation that will last. To do this, we have to keep some things in mind:
The components of the tuXlab must be as cheap as possible. Use what's available, and make the parts generic and interchangeable. Use standards, for example TCP/IP for networking. (See the section called “TCP/IP”.)
The tuXlab shouldn't require a permanent Internet connection in order to access cultural goods, and enable participation in the culture.
Especially in South Africa, a high-bandwidth Internet connection is incredibly expensive. Wireless service providers are just starting to appear in the big urban centres, but even they cost hundreds of Rands per month, and that's for home users.
In this way, we foster self-reliance and create local expertise, while building an international community.
In one of his essays, Richard Stallman writes about the importance of free software in developing local IT expertise:
--Richard Stallman, http://www.fsf.org/philosophy/schools.html Lastly, we can also save money. While it's essential to spend money on education, we have to make sure that the money goes as far as possible. By using only free software in tuXlabs, you save money in a couple of ways:
There are no software license fees to be paid. The Linux operating system is world wide, stable, and FREE.
In addition, for every Windows software product we have included a Linux alternative that looks for all intents the same. For example, a word processor (that can read Microsoft word document files, incidentally), a spreadsheet, a publisher, an HTML editor for creating web pages, a typing tutorial, etc. [4]
By using free software and open file formats that you can read without needing expensive software, we save money for the community.
Whether they intend to or not, teachers make their learners' families buy proprietary software if they use it at school. By using free software that learners can take home, the school helps the community to save money.
[2] This consensus is reflected in standards, such as the Portable Operating System Interface (POSIX).
[3] Source for the following paragraphs: http://www.fsf.org/philosophy/schools.html
[4] This paragraph is from http://wizzy.org.za/article/articleview/4/1/3.
Table of Contents
Get in contact. Contact the tuXlab team to gain information. The telephone number is 0860 OS HELP (0860 674 357); the website, from which you can download documentation, is http://www.tuXlab.org.za. You should also get in contact with the tuXlab closest to you, to see how you may assist each other.
Get on the mailing list. Join the tuXlab mailing list by registering at http://www.slug.org.za. You should join both the announce and schools mailing lists.
Submit questionnaire. Submit the completed questionnaire by sending a fax to 0860 674 357. Please complete the questionnaire electronically, or take care to write legibly if you fill it out by hand. You may find the questionnaire at the tuXlab page.
Attend your first tuXlab installation. Attend a tuXlab installation, to gain knowledge of the technology platform and installation process. The times and dates of installations are announced on the announce mailing list mentioned above.
Attend tuXlab induction installation; prepare proposal. Register to attend a tuXlab induction session. Prepare proposal as well as infrastructure requirements.
Attend your second tuXlab installation, finalise. After your second tuXlab installation, you can contact the tuXlab team to finalise outstanding requirements as well as await final approval.
In order to qualify as the recipient of a tuXlab, you must have a business plan that shows that you will be able to integrate the lab in your school's curriculum, that you can muster the resources to keep the lab in good operating condition, and that you will be able to involve the wider community to benefit from the lab. Look at the section called “Business plan template” for a good starting point.
Schools will be selected in clusters. Through clustering, schools are able to jointly plan and prepare for their tuXlabs, and can share resources and community support. Clustering is a method of ensuring that schools remain self-sufficient in the future.
A cluster consists of at least three schools. Each cluster will form a committee consisting of at least two representatives from each cluster school. These cluster committees should meet on a regular basis (at least quarterly) to discuss and share ideas, experiences and methodologies. Cluster communities should be in a position to setup a future Shuttleworth tuXlab with their collaborative knowledge and experience.
Open source communities are generally formed by developers, administrators and users that freely provide their expertise and time to the projects that interest them or that further their way of making a living. Contributing to an open source project does not just take the form of submitting source code, but rather any activity which benefits the community or open source in general. Establishing tuXlabs is similar in many respects to an open source software project --- rather than developing software, the Shuttleworth Foundation is installing labs, but still using the concept of open source volunteerism to facilitate this process. Establishing a volunteer group is a daunting task; however, with many possible methods to solicit volunteers, it is possible.
Chapter 5. Lab layout [5]
Table of Contents
Before you carry a lot of computers into a room, there needs to be a good deal of preparation. A classroom will need to be modified to include special features, such as a lockable cabinet to secure the switch and server, and a layout that accommodates the re-arrangement, addition, or removal of furniture. Electricity is another consideration: every computer needs power, and in order to protect them from power surges, the computers need to be on a separate power circuit.
Security is also an important consideration, and will involve at least burglar bars on the windows and an alarm system. The exact security measures that should be taken will differ from school to school. Several factors should be considered: for example, the known crime rate in the area, the isolation of the school, and the affordability of the security measures.
Security [6]
Here are some guidelines to consider when selecting a room for a tuXlab. They aren't hard and fast rules, and when you look through them, you'll notice where there's room for initiative. They should however be taken as a baseline to improve upon where there's opportunity.
Specifications:
Frame: 25mm square metal tubing, bolted to the wall.
Vertical Bars: 16mm round, 120mm c/c.
Centre Horizontal Bar: 30mm x 5mm flat bar.
While the above may be used as a guide, the diameter and the finish of the bars can be further determined by the school authorities and the project manager, as is deemed necessary according to the known risk in the area.
Galvanized metal mesh should be fitted on all outside windows.
The sides of the frame should be closed. For fasteners, use tamperproof coach screws with turn-off heads.

Wherever possible, the room identified for the lab should have a concrete floor above it. This means that in schools with two levels, it is preferable to select a room on the lower level. Where this is not possible and the ceiling is of hardboard or something equally flimsy, the ceiling should be covered with wire mesh or razor wire. In order to notice tampering, it's probably best for the wire to be beneath the ceiling.
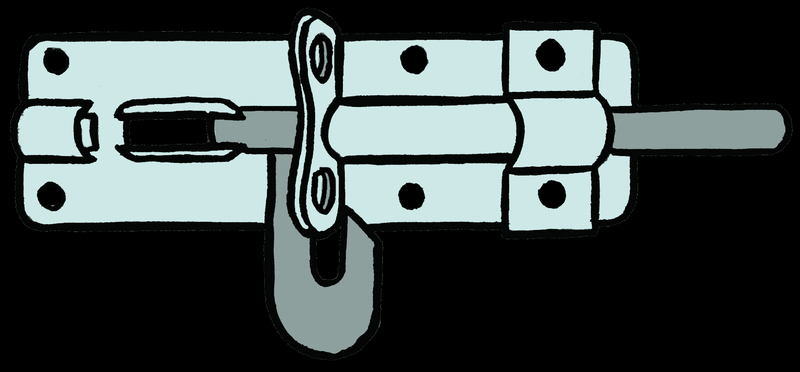
Since the gate is the key security feature, it should be made of steel of substantial thickness. In some cases, an internal security cage with steel gate or double steel gates are advised, depending on finances and risks. Methods of securing and fitment of locks should be strategic to make breaking in as difficult as possible.
Specifications:
Frame: 50mm x 50mm x 5mm. Angle Iron bolted to the wall on 3 sides.
 Angle iron and bracket
Bolts should be welded shut, or tamperproof.
The fitting of two barrel type locks covered with metal plates is advised.
A security alarm system with at least two room sensors is required. If the lab has a ceiling, a sensor in the ceiling is advised. The alarm must be monitored around the clock, with armed response in the event of an alarm event.
The number and location of sensors should be determined with input from security companies.
The design and length of desktops in most cases is determined by the number of computers and learners, and the size of the room. If there is room, it's advisable to install desktops for future expansion of computer network at once, depending on the finances available.
New desktops should be postform, minimum 28mm thick or similar stock, with a melamine/formica/varnished finish. They must be 900mm deep, to accommodate the keyboard, screen, and cabling without crowding and with proper ventilation. Depending on the chair height and the age of the learners, the top of the desktops should be 700 to 720mm from the floor. It is important for the desks to be at an appropriate height for the learners who will be using the lab, as an awkward posture can impair concentration.
Desktops should be mounted on 40mm x 40mm x 5mm angle iron brackets. They should only have legs if brackets are not a option, as legs tend to get in the way of learners sharing workstations. Each bracket must be a minimum of 750mm x 650mm. The brackets must be no less than 1000mm apart and each must be fixed with at two heavy duty rawlbolts, one of which must be as high up as possible.
Where appropriate, provision should be made for ducting along which to run wiring and network cabling underneath the work surfaces, with holes in the desktops to allow the cables to reach the computers and peripherals.
Where possible, the length of the desk should be chosen to allow 1200mm of space for each computer.
If it's at all possible, put the server in a separate room, where it's out of sight and locked away permanently. All that is necessary is for a network flylead to reach from the server to the network switch. Otherwise, a well ventilated, lockable cabinet should be built.
This cabinet should be at least 900mm square inside, as it will house the classroom server, another server acting as internet gateway, and a modem. The cabinet will be set away from the wall to allow for ventilation, since a pair of servers will generate a good deal of heat.
Notes:
A wall mounted steel mesh cabinet can also be installed.
Dimensions for steel mesh cage: LxDxH: 1200mm x 750mm x 720mm.
Height: 720mm Includes a 32mm x 900mm Postform Top.
Doors: 2 doors 450mm wide is required on the 900mm section.
Suitable locks must be fitted so that the doors cannot be easily opened.
It's important that all electrical work be done by a qualified technician, who should issue a certificate of compliance to the school upon completion of the work.
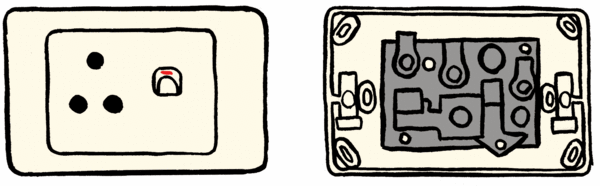
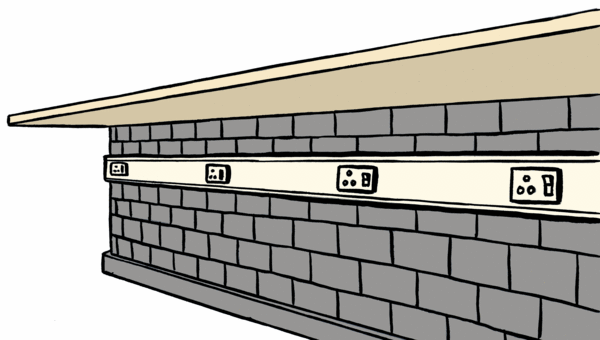
There must be enough 15 amp 3-point plugs to accommodate each computer on a separate plug, and in addition, there should be enough plugs for peripherals as well. A good rule of thumb is to have a double plug for each computer point. For safety reasons, electrical wiring must be in conduit piping below the work surfaces, but Surfix-type cable and wall mounted sockets are also acceptable and should be installed below desktops.

To avoid power spikes and dips, which are extremely damaging to workstations, the computer lab must be on its own electrical circuit. The circuit must be broken into segments, each adequate to accommodate the computers and peripherals on that segment. Air conditioners, or other equipment that use a lot of electricity, must not share the circuit with the computers.

Electrical wires to an island worktop in the middle of the room must preferably be under the floor or must have suitable ducting. Otherwise, it is a perfect certainty that someone will fall over the wires, breaking their neck and bringing all the workstations within reach crashing to the floor.
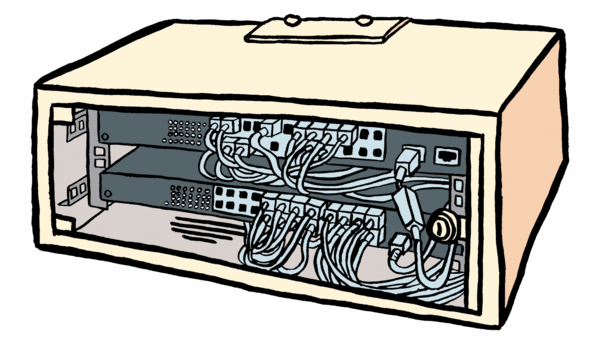
Where required, a 4U cabinet will be installed to house a minimum of two 24-port switches [7], leaving some space for expansion. Server equipment is a bit like bricks: they're all the same basic shape. One switch is 1U (or unit) big, so a 4U cabinet has room for four of them. Computer suppliers will know what you're talking about.
The placing of the switch cabinet should determined by the lab layout, and to minimize the required cable lengths, it should be placed in a central position. If installed in the lab, the cabinet should be 1000mm above or below desktops.
Network cabling must run in 40mm x 40mm square trunking. If financial considerations require that network cabling share the trunking of the electrical cabling, it is imperative for the electricity to be switched off at the subdistribution board whenever the trunking is opened during network troubleshooting.
Ensure that 10mm holes are made in trunking for the cable ends to reach their workstations. Allow at least 500mm of free network cable per computer, and loop and tie the extra length neatly. Network cables that are too short can be just as irritating as socks that are two sizes too small, and moreover lead to high blood pressure and increased risk of cardiac arrest. Cabling to an island desktop must preferably be under the floor or must have suitable ducting that will ensure the safety of pupils who have to walk over these cables.
[5] See tuXlab room layout from the Shuttleworth Foundation's site.
[6] See Infrastructure and Security
[7] See Chapter 8, Networking for an explanation of what switches do.
Table of Contents
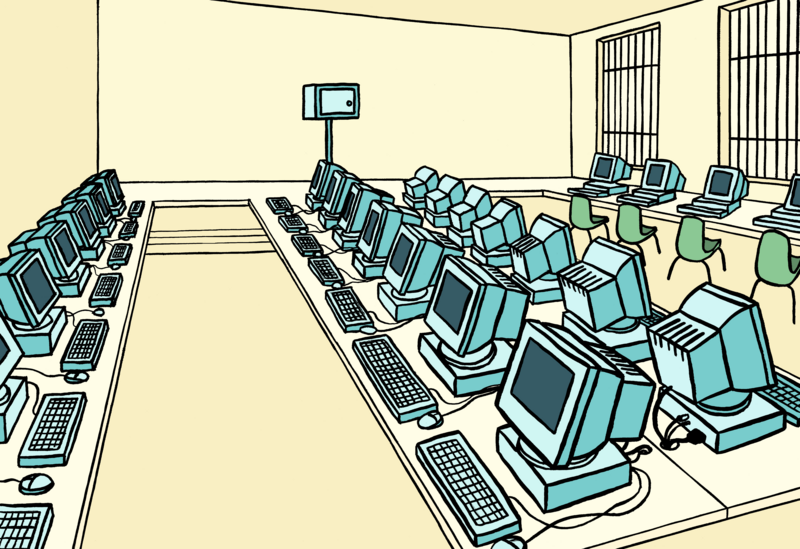
A tuXlab computer laboratory consists of a classroom full of thin client workstations communicating with a classroom server. The specific implementation of thin client computing used in tuXlabs is discussed in the section called “Linux Terminal Server Project”.
Thin client and fat client (also called "thick" or "rich" client) are mostly marketing terms for different configurations of computer. A thin client asks a central server to do most of its processing, and keeps as little hardware and software as possible on the workstation side. Ideally, the user of a thin client should have only a screen, keyboard, mouse and enough computing power to handle display and network communications --- you don't even need (or want) a hard drive. The less you have, the less there can go wrong.
A fat client does as much processing as possible itself and only passes data required for communications and storage on to the server. A standalone PC is the typical fat client with which everyone is familiar.

A thin client may be a software program executing on a generic PC, or it may be a hardware device, called a terminal, designed to provide only user input and display functions. Because old PCs (whether retired, written off, obsolete or just out of fashion) are easier to find than specialised thin client hardware, tuXlabs uses them as thin clients, with the appropriate software. Because they don't do much work themselves, the hardware requirements for these "old" PCs are very basic. Since every client in a thin client network asks a central server to do its work, all the individual workstations look the same: they all share the same server, and they all behave exactly like the server would if you were using it directly.
In addition, although everyone who uses the lab can have their own computing environment stored on the server, with their own files, desktop, and so on, the individual workstations can't get viruses or be misconfigured by curious learners --- there simply isn't anything to configure! The thin client doesn't have enough brains to get confused.
This means that the lab computers are trivial to keep up and maintenance is restricted to the server in the back room.
Thin clients are cheaper and require less administration than fat clients. On the other hand, they tend to require far greater network bandwidth, as display data will probably need to be passed to the thin clients. They can't do a single thing on their own --- for each and every action, they need to talk to the server. This means that a server for a room full of thin clients must be much more capable than a server used by fat clients.
One of the advantages that this configuration entails, is that all the software resides on the server, and so you only have to upgrade it once. In a fat client configuration, every workstation has its own copies of the software, and so any upgrade needs to be rolled out to every workstation.
The Linux Terminal Server Project (LTSP) is a configuration of Linux that allows you to connect lots of low-powered thin client terminals to a Linux server. The LTSP provides a simple way to utilize low cost workstations as either graphical or character-based terminals on a GNU/Linux server.
K12LTSP is based on RedHat Fedora Linux and the LTSP terminal server packages (see the section called “About the K12LTSP distribution” for more detail). It's easy to install and configure. It's distributed under the GNU General Public License. That means it's free and it's based on Open Source software.
Once installed, K12LTSP lets you boot (see the section called “Glossary”) diskless workstations from an application server.
There is a shorter version of this in the section called “Thin client startup process”.
"Power On Self Test" (POST). When you turn on the workstation, it will go through its Power On Self Test (POST; for this and other acronyms, see the section called “Glossary”).
Find the boot ROM. During the self test, the BIOS will search for expansion ROMs. The network card contains an Etherboot boot-ROM, which is an expansion ROM. The BIOS will detect the ROM on the network card (it doesn't know about the network card, it only notices the ROM).
Boot. Once the POST is complete, execution will jump into the Etherboot code.
Find the network card. The Etherboot code will scan for a network card. Once it detects the card, the card will be initialized.
DHCP request. The Etherboot code will then broadcast a DHCP request to the local network. The request will include the MAC address of the network card.
DHCP request received. The dhcpd daemon on the server will see the broadcast request from the workstation, and look in its configuration file for an entry that matches the MAC address of that workstation.
DHCP request reply. The dhcpd daemon will construct a reply packet, containing several pieces of information. This packet will be sent back to the workstation. The reply information includes:
an IP address for the workstation,
the netmask setting (see the section called “Glossary”) for the local network,
the pathname of the kernel to download (this is a filesystem path on the server),
the pathname of the root filesystem (see the section called “Glossary”) to mount as the root of the client filesystem,
optional parameters to be passed to the kernel, via the kernel command line.
Boot ROM configures TCP/IP interface. The Etherboot code will receive the reply from the server, and it will configure the TCP/IP interface in the network card with the parameters that were supplied. Once this is done, the client computer has an IP address on the network.
Download the kernel using TFTP. Using TFTP (Trivial File Transfer Protocol), the Etherboot code will contact the server and begin downloading the kernel.
Kernel downloaded. Once the kernel has been completely downloaded to the workstation, the Etherboot code will place the kernel into the correct location in memory.
Control passes to kernel. Control is then passed to the kernel. The kernel will initialize the entire system and all of the peripherals that it recognizes.
Mount temporary boot filesystem as RAM disk. This is where the fun really begins. Tacked onto the end of the kernel is a filesystem image. This is loaded into memory as a RAM disk, and temporarily mounted as the root filesystem. A kernel command line argument of root=/dev/ram0 tells the kernel to mount the image as the root directory.
Kernel boot sequence calls linuxrc shell script (before the normal boot sequence starts). Normally, when the kernel is finished booting, it will launch a program called init. But, in this case, we've instructed the kernel to load a shell script (see the section called “Glossary”) instead. We do this by passing init=/linuxrc on the kernel command line.
Identify kernel module for network card. The linuxrc script begins by scanning the PCI bus, looking for a network card. For each PCI device it finds, it does a lookup in the /etc/niclist file, to see if it finds a match. Once a match is found, the name of the NIC driver module is returned, and that kernel module is loaded. For ISA cards, the driver module MUST be specified on the kernel command line, along with any IRQ or address parameters that are required.
Load kernel module for network card. Once the network card has been identified, the linuxrc script will load the kernel module that supports that card.
linuxrc makes DHCP query. dhclient will then be run, to make another query from the DHCP server. We need to do this separate user-space query. We cannot depend on the query that comes from Etherboot, because it gets swallowed up when the kernel uses it. (XXX: I don't understand "swallowed up".) The kernel will also ignore any NFS server that might have been specified in the root-path. This is important if you want the NFS server to be different from the TFTP server.
Configure eth0. When dhclient gets a reply from the server, it will run /etc/dhclient-script, which will take the information retrieved, and configure the eth0 interface.
Mount the root filesystem from the server via NFS. Up to this point, the root filesystem has been a RAM disk. Now, the linuxrc script will mount a new root filesystem via NFS. The directory that is exported from the server is typically /opt/ltsp/i386. The new filesystem can't just be mounted as / immediately. It must first be grafted into the local filesystem by mounting it, typically on the path /mnt. Then, the client can do a pivot_root. pivot_root will swap the current root filesystem for a new filesystem. When it completes, the NFS filesystem will be mounted on /, and the old root filesystem will be mounted on /oldroot.
Hand off to the normal init program (non-LTSP boot sequence continues). Once the mounting and pivoting of the new root filesystem is complete, we are done with the linuxrc shell script and we need to invoke the real init program.Note: from this point, all file paths (except those starting with /oldroot, of course) refer to files that are served from the server via NFS.
init processes /etc/inittab . init will read the /etc/inittab file and begin setting up the workstation environment.
LTSP starts in runlevel 2. init works in terms of runlevels. A runlevel has a number, and specifies a set of services that should be available while the system is running in that runlevel. The LTSP workstation starts in runlevel 2. That is set by the initdefault line in the inittab file.
Run rc.local. One of the first items in the inittab file is the rc.local command that will be run while the workstation is in the sysinit state. (XXX: sysinit?)
rc.local creates a RAM disk for volatile data during bootup. The rc.local script will create a 1Mb RAM disk to contain all of the things that need to be written to or modified in any way.
RAM disk mounted as /tmp. The RAM disk will be mounted as the /tmp directory. This directory exists in order to hold files that need to be written during the boot process. We don't want to write to these files on the hard disk, because then we'll change them for all other clients as well, and the changes pertain only to our client while it's booting.
Any files that need to be written will actually exist in the /tmp directory. On the hard disk of the server, there are only symbolic links pointing to these files.
The /proc filesystem is mounted. This is a virtual filesystem that exposes information about all the currently running processes as a hierarchy of textfiles that may be read exactly as any other file on disk.
Network swap enabled. If the workstation is configured to swap over NFS, the /var/opt/ltsp/swapfiles directory will be mounted as /tmp/swapfiles. Then, if there isn't a swapfile for this workstation yet, it will be created automatically. The size of the swapfile is configured in the lts.conf file. For more detail about this file, see the section called “Troubleshooting reference”.
The swapfile will then be enabled, using the swapon command.
Configure loopback interface. The loopback network interface is configured. This is the networking interface that has 127.0.0.1 as its IP address.
Mount /home. If LOCAL_APPS is enabled (see below), then the /home directory will be mounted, so that running applications can access the users' home directories.
Create /tmp . Several directories are created in the /tmp filesystem for holding some of the transient files that are needed while the system is running. Directories such as:
/tmp/compiled
/tmp/var
/tmp/var/run
/tmp/var/log
/tmp/var/lock
/tmp/var/lock/subsys
will all be created.
Configure X Windows. The X Windows system will now be configured. In the lts.conf file, there is a parameter called XSERVER. If this parameter is missing, or set to "auto", then an automatic detection will be attempted. If the workstation has a PCI video card, then we will get the PCI Vendor and Device id, and do a lookup in the /etc/vidlist file.
If the card is supported by XFree86 31.X, the pci_scan routine will return the name of the driver module. If it is only supported by XFree86 32.3.6, pci_scan will return the name of the X server to use. The rc.local script can tell the difference because the older 33.3.6 server names start with XF86_.
Generate XF86Config. If XFree86 34.x is used, then the /etc/rc.setupx script will be called to build an XF86Config file for X4. If XFree86 35.3.6 is used, then /etc/rc.setupx3 will be called to build the XF86Config file, based on entries in the /etc/lts.conf file.
rc.local resumes, start_ws created. When the rc.setupx script is finished, it will return to rc.local. Then the /tmp/start_ws script will be created. This script is responsible for starting the X server.
Configure syslogd. The /tmp/syslog.conf file will be created. This file tells the syslogd daemon where to send logging information (this may be any host on the network). Any program, including the kernel, that wants to record information for the purposes of monitoring, auditing, debugging or later reference can make use of syslogd, which sees to it that this information is written to a file, and that the logged information is eventually cleaned up.The syslog host is specified in the lts.conf file. There is a symbolic link from /etc/syslog.conf to the /tmp/syslog.conf file.
Start syslogd. The syslogd daemon is started, using the config file created in the previous step.
init resumes, changes to default runlevel. Control is then passed back to init, which will look at the initdefault entry to determine which runlevel to enter. As of lts_core-2.37, the value of initdefault is 2.
What the different runlevels do. A runlevel of 2 will cause init to run the set_runlevel script which will read the lts.conf file and determine what runlevel the workstation will run in.The standard runlevels for LTSP are 3, 4 and 5.
- 3
This will start a shell. This is very useful for debugging the workstation.
- 4
This will run one or more Telnet sessions in character mode. This is great if you are just replacing old serial terminals.
- 5
GUI mode. This will bring up X windows, and send an XDMCP query to the server, which will bring up a login dialog box to let you log into the server. You will need a display manager listening on the server, such as XDM, GDM or KDM.
If a user reconfigures a workstation in a fat client computer lab, all the other users of that workstation will have to cope with these changes. This means that if someone inadvertently sets the workstation to use black type on a black background, for example, then no-one will be able to see what's going on.
In contrast, in a thin client lab, every user has their own files, their own email, and their own desktop environment that they can change to their liking without influencing anyone else, all stored on the classroom server. A configuration slipup like the above will inconvenience only themselves. [8]
Most of the equipment in a computer lab are workstations for learners to use. There may be one or two printers, network switches and a server, but they are far outnumbered by between 20 and 40 client workstations.
In a tuXlab, these can all be really old, used, previous-generation computers. This is because the demands on these machines is so slight that almost anything will do. All those stacks of old computers everywhere that no one knows what to do with are suddenly useful, and saving schools vast amounts of cash that they would normally have to outlay on relatively new equipment so they can run contemporary software.
The thin client paradigm also means that requirements for uniformity among terminals is relaxed. As long as they conform to a couple of basic requirements (network boot, SVGA graphics card, enough RAM) it doesn't matter if they have idiosyncratic hardware. Only the server configuration needs to be maintained. Heterogenous hardware doesn't make life difficult for the admin.
The thin-client network in the lab ensures that each terminal, no matter what its own computing characteristics, behaves with all the speed and capability of the server, so each user has an experience of top quality, smooth, fast computing. Unfortunately, this does mean that if some of your client workstations are powerful, modern machines, they may not be fully utilised in a default tuXlab configuration, as they will still be letting the server do all the work.
In a tuXlab, the most accessible hardware is also the easiest to replace and the hardest to use outside the lab. A tuXlab client workstation on its own, without the classroom server, is more or less useless. It's too bulky for a doorstop, and it can't run modern software. It doesn't even have a hard drive. [9]
As the terminals only serve to display a session from the classroom server, it doesn't matter which one you use. If one breaks while you've using it, you can move to the next one, log on, and pick up where you left off. If someone is using the workstation where you were working, go to another one and log in there to regain access to your desktop.
Every solution will have some drawbacks, and a tuXlab is no exception. I'll just mention a few in passing.
- Unreal Tournament will be laggy
Graphics-intensive applications such as games will not perform well, as all the display information will have to be pushed over the network by the server. This is hundreds of times slower than driving a local graphics card. Playing action games, however, is not a goal of the tuXlab project.
- All the clients run the same OS
Since it's really only one instance of Linux serving all the desktops and applications, all the clients in the lab will necessarily offer a Linux environment. It is possible for the server to run software such as Wine (which enables many Windows programs to run under Linux) or VMWare (which allows the server to run instances of other operating systems), but in these cases the underlying system will still be Linux, and the server will still be doing all the work.
- Single point of failure
While it's very convenient that the thin-client workstations are interchangeable and that you can access your desktop from anywhere, it does mean that a catastrophic failure of the server will put all client workstations out of commission.
- Server
Memory--- The server should have 2Gb RAM or more (512Mb for the base system, and 50Mb for each additional client). As long as you're using it all up, more RAM means more speed (it doesn't help to have RAM that you don't use). Too little RAM will bring your server to a crawl as it starts swapping memory to the hard drive. If you run out of memory, performance will be unacceptable.
Hard drive--- SCSI is faster than IDE: We've seen LTSP servers slow to a crawl when more than 10 clients are running from IDE drives. SCSI drives are better equipped to handle the multiple read/write requests.
Network--- Your server will have at least one ethernet card to create a private network ( 192.168.0.x). This card connects to a switch for terminals. If there is a school network to which you need to connect, or if the school has a Internet connection via the server, it will have a second ethernet card, which will get an IP address on the second network.
- Clients
Memory--- Client workstations should have at least 32Mb of RAM. Clients aren't that dependent on swap space for extra memory capacity, since memory usage on them is reasonably constant because they don't execute applications: they only display them.
Hard drive--- Client workstations should not have hard drives.
Network--- Each client workstation should have one network card with a boot ROM to enable booting from the network.
- Switch
An Ethernet hub is not acceptable (see the section called “Switches / Hubs”), it's too slow for network boot and NFS. Having a fast Ethernet switch will make your life better and more colorful.
The number of ports on the switch must be enough for your clients and server. If you have more than 24 NICs, 2 or more 12-port/16-port fast Ethernet switches are recommended. The client ports should be 100 megabit, and there should be a gigabit port for the server. Since all clients get their display from the server, a slow link to the server would be a bottleneck for the whole lab.
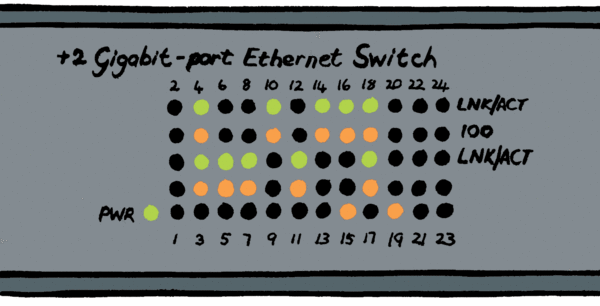 The front panel of the switch shows a light for every network cable that's been plugged in. The light shows whether the link is up, whether there is traffic and what its speed is.
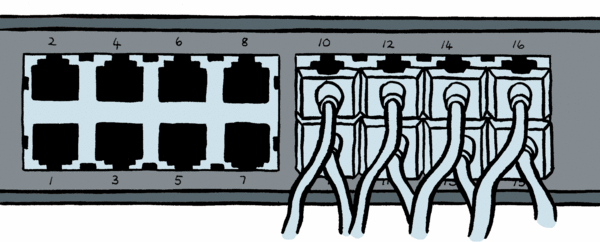 The cables from the workstations all terminate at the switch. If you don't label them, they get very hard to tell apart!
- Monitors
The display size should be at least 15", and the monitor must be capable of SVGA video modes. It should also be compatible with the video card of the client.
- Uniform equipment
If you use the same equipment throughout your tuXlab, it becomes easier to buy in bulk and to swap out components. It also makes it easier for tuXlabs to assist each other with skills and equipment.
Heterogenous boxes, in comparison, are harder to keep running, and more likely to be "throw-away" --- not worth trying to resurrect. As long as they don't cost you anything, this is worth it, but you have to guard against them becoming a drain on your time and resources.
Locally, FreeCom supplies tested refurbished computers. Because of the high volume of hardware required by the large number of tuXlabs installed, the Shuttleworth Foundation has procured the client workstations from international distributors such as Computer Aid. Other workstations have been donated by private industry.
While there is little to do for the installation of the thin client workstations, there are a couple of things you can pay attention to.
- Network cards
All the client computers need to get a network card with space for a boot PROM (see the section called “Glossary”), so that they can start looking for the server on the classroom network as soon as they are switched on. The server also needs a network card, and it needs to be a fast one (gigabit ethernet), as the link between the server and the switch is ten times quicker than the link between the switch and the client workstations.
- Boot PROMs
Depending on the network cards you managed to get, the correct etherboot image may need to be written to the network cards. The Diskless Remote Boot in Linux project has made available an Etherboot NIC Detection Disk which can help you to determine what you need to write to the card.
- Dual-booting
The BIOS in the client workstations normally needs to be configured to boot from the network. To do this, watch the workstation screen after turning the power on --- for a couple of seconds, the BIOS will display a notice that you may press a key (such as DEL or F8, depending on the BIOS) to enter setup mode. This will enable you to specify where the computer should look for boot records during startup; for example on a CD, a floppy disk, a hard disk, or the network card. In the event that you have a relatively capable workstation with a hard drive, you may want to boot the workstation as a standalone computer from time to time. To do this, you may configure the BIOS to look for a boot record on a floppy disk before trying the network card.
One kind of scenario where this may be useful, is where you have an existing computer lab with software installed at each workstation. Boot from hard disk to access the standalone workstations, and boot from the network to have a tuXlab! It is even possible for the standalone workstations to access the tuXlab network, and to use the classroom server as a fileserver, and the Wizzy server as an internet proxy. Since a tuXlab is implemented using standard protocols, this will work no matter what operating system is installed on the workstation computers.
- Other resources
This cookbook can do no more than scratch the surface. Some of the other resources regarding thin-client computing available on the web include:
Diskless Remote Boot in Linux (DRBL) for Redhat 8.0, 9, Fedora Core 1, 2, Mandrake 9.2, 10
Root over NFS clients & server HOWTO... if your workstations have disks, and you don't want to delegate processing to the classroom server.
Network Boot and Exotic Root HOWTO This document explains how to quickly setup a Linux server to provide what diskless Linux clients require to get up and running, using an IP network. It is based on the Diskless-HOWTO, the Diskless-root-NFS-HOWTO, the Linux kernel documentation, the etherboot project's documentation, the Linux Terminal Server Project's homepage, and the author (Brieuc Jeunhomme)'s personal experience.
Table of Contents
A tuXlab includes both Chapter 11, Open source Educational Software as well as office tools and web browsers (see the section called “Applications”). At its core, however, it consists of the server software that runs the classroom server and the Wizzy internet proxy server.
A tuXlab classroom server is based on the K12LTSP distribution, with some configuration changes and additional software packages.
K12LTSP is based on RedHat Fedora Linux and the work of the LTSP. It's easy to install and configure. It's distributed under the GNU General Public License. That means it's free and it's based on Open Source software.
This is quite a mouthful, so I'll unpack the terms one by one.
The LTSP is the Linux Terminal Server Project. This project assembles all the software components that are necessary for a computer to act as a fat server for a network of thin clients, and provides the configuration necessary for the server to function as such.
RedHat Fedora Linux is the free distribution packaged by RedHat, Inc. The K12LTSP team has added an option to the RedHat installation menu, so that installing a classroom server is as simple as choosing the first installation option and answering some questions.
The K12LTSP distribution tries to make it as easy as possible for you. It is a regular Fedora distro with an option to install LTSP right there in the setup screen. When installing, the LTSP option is the first item on the menu, added above the default Workstation, Server and Custom options. This means that you don't have to mess around with the configuration files until you've had a chance to see what it is they do, and by then you'll probably only need to tweak them a little.
The LTSP server defaults to an IP gateway and firewall when two ethernet cards are present. This will only be the case in tuXlabs that are permanently online, which will usually not be the case. Normally, the Wizzy server will be the gateway, as all tuXlabs with Internet access use a Wizzy server.
A Wizzy server can be used to provide a managed internet access solution for a tuXlab. Currently, a Wizzy server is an extra to a tuXlab install. The Shuttleworth Foundation may award a Wizzy server to a school with a tuXlab if the school demonstrates that it is making good use of the lab. Wizzy is a project of Andy Rabagliati, a techno-philantrophist who has been wiring rural schools for cheap Internet connectivity for many years now.
The software (like K12LTSP) is based on RedHat Linux, currently version 8.0. Whereas K12LTSP is based on RedHat Fedora, Wizzy is an adapted version of Whitebox Linux, itself a straight recompile from source RPMs of RedHat Enterprise Linux. Many extra packages have been added, all under the GPL licence.
It performs the duties of dialup manager, firewall, mailserver (IMAP mailserver XXX), web cache, and authentication server (LDAP authentication server XXX). The Wizzy server does normal dialup via a telephone line, but it can also do ADSL and wireless. It would be possible to do all these things on the classroom LTSP server as well, but a custom mail arrangement would still be necessary: while the tuXlab is not connected to the Internet, mail needs to be delivered to an remote server. Another reason to separate the Internet gateway from the classroom server, is that it might not be such a good idea for the classroom server to have a public-facing IP address. All machines exposed to the Internet are vulnerable to compromise, and the classroom server contains all the user data.
The way in which the Wizzy server sends and receives email is customized to work with an intermittent Internet connection. It utilizes a protocol that was more commonly used in the days before permanent Internet connections became common, namely UUCP (the Unix-to-Unix Copy Protocol). UUCP is suited to queuing data to be copied to remote hosts for delivery when a network connection is established.
Wizzy has the goal of providing all its services via UUCP, in order to accomodate high latency connections where there may be long disconnected periods. This type of connection includes situations where a connection is established by dialing up at night when phone rates are low, as well as situations without any dialup access at all.
In cases without dialup access, the connection is made by carrying the data across by hand! [10] The transfer medium may be, for example, a USB memory stick, a mobile wireless-enabled laptop, or a USB hard drive. The transfer medium will contain newly fetched data and the queued requests for new web pages, as well as mail waiting to be sent. This is not a stated goal of the tuXlabs project, so if your school wishes to pursue this route, you may have to contact Wizzy to work out the details.

If you do have access to a telephone line for the tuXlab, the Internet is dialed up only at night when the rates are low (Telkom South Africa provides a particular phone account that allows a single 12 hour phone call for R7). In this period, approximately 250Mb of email and web material can be downloaded onto the Wizzy server in the classroom. In the morning, after the phone has been hung up, the learners can access the downloaded material as though they had a direct web connection. Their experience of email and web during the school day is almost identical to a very fast online web experience, with the exception that newly requested pages will only be available by the next morning. [11]
Normally, if you want to connect to the Internet, you need a telephone line and a modem, a satellite uplink, or some other means of tapping into 'the Net'. Unfortunately, in South Africa, the necessary telecommunications infrastructure is not always there to tap into. Around a third of South Africans don't have a phone line, and roughly 88% of schools in the Northern Province lack an Internet connection. [12]
Every student can have email and web access without the cost of being online. This is true even for schools that don't have a telephone.
While the delay in retrieving web pages is a necessary consequence of the Wizzy solution, it has a desirable side effect in that it helps educators to manage web access. Since anybody with an Internet connection can publish on the Web, there is an absolute ocean of complete trash that threatens to engulf the unwary browser. Groping through this mess just wastes school resources. Automated solutions to this issue have been proposed, often by companies that market filtering products. Apart from the fact that these products suffer from both false positives and negatives, blocking material unnecessarily and letting undesirable material through, it shifts responsibility from the teacher to a software product.
The Wizzy solution believes that it's better to let the teacher decide what is appropriate. This also allows the teacher to stay in touch with the material accessed by the learners he or she is teaching. Teachers can explicitly choose the web material that learners can access and definitively reject web material that is not appropriate. They can also set the Wizzy server to monitor websites, retrieving new versions as they become available.
Because the school is never in direct connection with the internet, but rather has its web content delivered upon request, students cannot "surf" the Internet. However, since all the web sites that have been requested by the IT administrator of the school are delivered and stored on the school's server, the students can "surf" this local web cache as though it were a mini-internet.
These specially chosen web sites can easily number in the hundreds. They can be updated daily; and should a new site be desired on a regular basis, the school would have to wait only one day for the delivery to begin. The "surfing" of this mini-internet within the tuXlab costs nothing, and is fast enough to give you whiplash, since all communication takes place within the tuXlab, between the server and the client computers. [13]
tuXlabs aims to give educators the tools to help learners explore computers and the Wizzy server allows them to put reasonable limits on learners' access, guiding them towards independent use of the computer as they mature. tuXlabs does not make any judgement regarding what content is regarded as appropriate, but is there to help provide the tools and documentation to help educators with these decisions. The focus is more on the "guidance" aspect, rather than restriction, as the former is a positive activity while the latter is negative.
The Wizzy solution integrates seamlessly with existing labs. Normally, no additional equipment is required to have this kind of Internet lab.
First, a recap of the basics. [14] How does mail from far away get to your account, say: somebody@myschool.wizzy.org.za?
The remote mail client probably punts the mail to a smarter host --- the SMTP (Simple Mail Transfer Protocol) server of their ISP (Internet Service Provider). This will have been configured by the sender when first setting up their mail client.
Their ISP mail server will ask a local nameserver (i.e. DNS server) for the MX (Mail Exchange) records of myschool.wizzy.org.za. These are the IP addresses of machines listed as handling mail for this domain. The ISP will try to deliver directly to the lowest-numbered MX record in the list, via SMTP. If it cannot connect, it will try other MX hosts, usually in ascending order.
The DNS service for the tuXlab and Wizzy networks is provided by SchoolNet
With this step, or via intermediate MX hosts, the mail will eventually land on the target host --- the lowest-numbered MX, often your local ISP. Most of the time, your ISP will deliver all the mail for that domain into a single mailbox, and leave you to figure out the rest.
The reason why the ISP can't easily do more, is due to the fact that SMTP is not authenticated to specific users (XXX: not sure about the previous phrase), and therefore relies on name services --- fixed IP addresses --- to route messages to their destination. This makes it impractical for intermittently connected machines, that dial up nightly and are dynamically assigned an IP address by the ISP, to function as mail exchangers.
One way to preserve the SMTP protocol across dynamic IP addresses is to batch SMTP commands in a file, and pass the file over a separate transport. [15] Batched SMTP is similar to normal SMTP, but, because it is being written to a file, all responses are ignored. (Normally, an SMTP connection is a conversation of commands and responses between the sending and the receiving servers, so that the sender may probe for the capabilities of the receiver, confirm successful delivery, etc.) Fortunately, this is not critical: as long as all the responses are known to be OK, everything works.
The Wizzy solution is to write messages to a file, use UUCP over TCP/IP as an authenticated transport from the SMTP server of the ISP (in this situation, Andy's Cape Town Wizzy server will be the SMTP), and unpack the batch at the final destination (the tuXlab). The batched SMTP format is described in RFC 2442 --- The Batch SMTP Media Type
Wizzy uses exim as the SMTP agent at both ends, and Taylor (GNU) UUCP as the middle transport.
OpenOffice is a full office suite, intended to measure up to and surpass Microsoft Office. This is what its original author, Marco Börries, intended when he started StarDivision to create the software that would eventually become OpenOffice in 1984, when he was just sixteen. He called it StarOffice. By the time Sun Microsystems bought Marco's company in 1999, over 25 million copies of Star Office had been sold to customers who needed platform independence (see the section called “Glossary”) and an alternative to Microsoft.
In July 2000, Sun released most of the Star Office source code (about 7.5 million lines of C++) to the stewardship of the open source community, under the Free Software Foundation's LGPL license. The community project has as its goal: "To create, as a community, the leading international office suite that will run on all major platforms and provide access to all functionality and data through open-component based APIs and an XML-based file format." The open APIs (see the section called “Glossary”) and file formats are turning OpenOffice into a platform in its own right, supporting projects such as OpenGroupware, which aims to provide an open alternative to Microsoft's Exchange and SharePoint products.
This is in direct contrast to Microsoft's approach, who have always used the fact that only their own software could easily use their document formats to keep customers locked in, in effect reserving the Office platform to Windows applications.
OpenOffice includes a word processor, spreadsheet, interfaces to many databases, a presentation builder, and a diagramming tool. It is now able to decode most variants of Microsoft Office document formats, but although its StarBasic macro language is syntactically identical to Visual Basic, OpenOffice cannot execute Visual Basic scripts. Although these are preserved upon conversion, the scripts need to be adjusted to use the OpenOffice API before they can be used.
OpenOffice can be used to teach all the basic computer skills required to enter the job market, and as the design paradigms of the software is very close to Microsoft Office, the skills learnt are readily transferable.
In 1998, Netscape Communications released the source code of its Navigator web browser software as open source, and the Mozilla project was born. Netscape released their software as open source in order to compete with Microsoft, who were bundling Internet Explorer with every copy of Windows sold. Netscape hoped that the cooperation of thousands of developers around the world would create a better product than Internet Exporer. It did, but it took years, and Netscape fell by the wayside. The code lived on, though.
In 2004, six years after the start of the project, the non-profit Mozilla Foundation that was created to coordinate the project finally released version 1.0 of the Firefox browser. Earlier versions of the software had been in use for years, but at last it was deemed ready for a high-profile release to the general public.
The full Mozilla suite includes far more than the web browser. It includes Thunderbird, a mail client with address books and calendaring support, and Composer, a web page editor. For developers, it includes Venkman, a Javascript debugger, and the DOM Inspector, a wonderful tool for interactively exploring the enormous, intricate internal structure of complicated web pages.
The codebase has been painstakingly restructured to get as much use out of it as possible. So, for instance, all the Mozilla applications use the same rendering engine, called Gecko, to layout and display HTML pages on screen. This is critical, since it is extremely hard work to implement the standards that govern web page structure and display correctly. Mozilla has the best support for the HTML and CSS standards of any browser out there. In the past, Microsoft has used Internet Explorer's idiosyncratic and incomplete implementation of web standards to coerce people to craft their web pages to look good in Internet Explorer at the expense of other browsers. For the web to become a dependable platform, however, developers have to be able to build on solid public standards that don't leave them at the mercy of any company's prosperity.
As with OpenOffice, the Mozilla project is becoming a platform for extensions from the community.
As the Internet has become more popular, viruses, spam, spyware and trojans have grown to be an enormous problem. These are all caused by programs that are received and executed on computers without the knowledge or consent of their users. How can this happen?
In general, there are two ways for this to happen:
You may have given implicit permission without intending to do so;
The unwanted program may be exploiting errors or bugs in some program in order to insinuate themselves into it, so that it can execute with the permissions of the original program.
Firefox and Thunderbird try to protect you as far as possible by setting up reasonable defaults. Nothing in an email message is executed unless you explicitly run it yourself. And execution of Javascript in web pages can be switched off at any point. Firefox also allows you to grant or revoke specific permissions (e.g. opening popups, hiding the status bar, or changing images) to Javascript.
The Mozilla suite also affords you a measure of protection from the second case. While Internet Explorer has access to practically the entire running system of a Windows PC via a powerful integration technology called ActiveX, Firefox and Thunderbird are far more restricted. It also helps to be running on Linux, where the user of the web browser will generally not be able to damage the operating system, and the system administration account is never used to run user applications.
Table of Contents
On its own, a computer can be a fascinating tool. However, when you connect many computers together using a network, worlds of possibility open up. In a network, better use is made of all the connected resources, because they can be shared. For example, if there is one printer, everyone can use it. It is also possible to concentrate resources where they will have the greatest benefit --- all the additional memory added to the server becomes available for running the programs of all the clients.
The advantages of networking only start with economies in hardware expenditure. Another aspect, one that is really far more exciting, is the opening up of communication channels among lab users, and, if you can reach the internet, with the world at large. Only some of the lab users will be interested in computers for their own sake. Many more users will be writing essays, asking questions, drawing pictures or practising skills using the educational programs offered in a tuXlab. With a network, they can easily share documents, discuss them, and have a record of discussions for the learners that come after them.
A tuXlab will usually have only one or two printers for the lab as a whole. Since everyone will use these, it's worthwhile to get the best printers you can afford: as long as they're on a network, everyone will benefit.
Depending on the make of printer, it may be connected to the network switch with a network cable, or it may be connected directly to a print server (which may be the classroom server) with a parallel cable.
Printing in a tuXlab will be managed using CUPS, the Common Unix Printing System. It provides a web interface (accessible at http://printserver:631/) where you may check the status of printers and print jobs, print test pages, and so on. (printserver is the hostname of the printer or the server to which the printer is connected.)
Email has been called the "killer application" of the Internet. It's the most ubiquitous and accessible way to communicate with people across the world.
Not all tuXlabs have email. Generally, you'll only have email if a Wizzy server is installed along with the classroom application server. The Wizzy server functions as a post office and a stand-in, or a proxy, for the world wide web.
If your tuXlab is equiped with a Wizzy server, you'll be able to send mail to each other and to other schools or mailing lists all over the world.
XXX: How does Wizzy handle delivery of local email? Does that also go via the Cape Town Wizzy server, and take a day for the round trip? Probably not ..
Without a network, transferring files from one computer to another is a difficult and inconvenient process. You have to copy the file onto some storage medium (such as a floppy disk or a CD) and carry it over to the other computer yourself. Floppy disks tend to break or become silently corrupted. CDs can only be written once, and are relatively expensive. Even rewritable CDs are slow to use, and even more expensive. Finally, all kinds of disk drives have many moving parts, and they have to deal with a disk platter that spins hundreds of times per second. They all break eventually.
It's much better to shift the job to network cables. Once laid, a cable will keep on working forever. It doesn't cost anything to transfer data over it, and it's very fast.
In the thin-client configuration of a tuXlab, the reality is even better. None of the client workstations store any data, so the need for them to have internal hard disk drives has also been eliminated. The only computer in a tuXlab that must contain at least one disk drive is the classroom server. Every user of the tuXlab --- in other words, every person with a username and password to login at a workstation --- has some storage space on the classroom server's hard drive allocated to them, where they may store their data. They all reach their data via the network.
This means that making a copy of a file for another user comes down to making a copy elsewhere on the same disk drive. Similarly, for files that many people need to share without necessarily needing their own copies to modify, this means that everyone may access the exact same copy of the file. In a non-networked situation, every single workstation would need their own copy of such files. This is the case for all the operating system and application software, for example.
Without a network, every workstation needs to be sufficient unto itself, and to provide all the storage space and processing power that a user is likely to need. With the introduction of a network, it becomes feasible to differentiate between computers, and equip them according to their roles. For a tuXlab, this means removing everything that can break or costs money from the client workstations --- their role is only to receive data over the network, and to display the user's desktop, sent from the server. The server does all the work, so it can have all the memory, disk space and computing power that you can afford. Everyone benefits from money spent on the server.
In this section, we have a look at the different kinds of equipment that we need to set up a network.
There are many different kinds of computer networks, with different strengths and weaknesses. Some might be designed for the maximum data transfer speed, some to minimize costs, and others to make it as easy as possible to connect computers to one another. In the case of tuXlabs, we need a really fast network, because everything displayed by the client workstations needs to be sent from the server over the network. We also need a standard network that allows any kind of computer or peripheral to be added to the network easily.
In order to meet these criteria, tuXlab uses an Ethernet network with category 5 network cabling (CAT-5, for short).
In an Ethernet, data packets are broadcast onto the network for all connected devices to receive. The devices themselves then examine the data packet to determine whether it was meant for them. If so, they process it; otherwise, they drop it on the floor and it vanishes.
The name "Ethernet" comes from the ancient Greek concept of "ether". According to them, this was the fluid that filled the spaces between stars. Of course there isn't any such thing, but they made it up because surely there couldn't be nothing between stars, could there? In an Ethernet, as far as the communicating computers are concerned, there aren't any cables either. Of course there really are cables, but you don't have to send a data packet down a specific cable to a specific computer. You just entrust it to the "ether", and all computers get the packet.
There are different ways of wiring an Ethernet local area network. One way is to simply lay coaxial cable from one computer to the next, until all the computers are connected, forming a ring. This is relatively simple, but the resulting network is slow, both because of the electrical properties of the coaxial cable, as well as because all the data has to share a single cable.
Since a tuXlab needs more speed, a star topology is used instead diagram. In this configuration, a single CAT-5 cable connects each workstation to a central node. This central node acts as an interchange. In a simple network where speed isn't critical, this node can be a hub. This is a device with ports where you can plug in many network cables; usually 8, 16 or 24. A hub is very chatty: it simply repeats all the data coming in on one port on all the other ports. This way, the data is sure to reach the computer it's meant for. Unfortunately, it also reaches all the other computers, taking up precious network bandwidth.
Instead of a hub, you can also use a switch. It looks just like a hub, but it's cleverer about routing the traffic that moves across it. In short, it remembers which computer is where, so that when it receives a data packet meant for a particular computer, it sends it only to the port where that computer is connected.
Switches can be linked together to form one bigger switch. For example, if you have a lab with 25 workstations, you can link together two 16-port switches using a flylead. See the section called “Switch cabinet”.
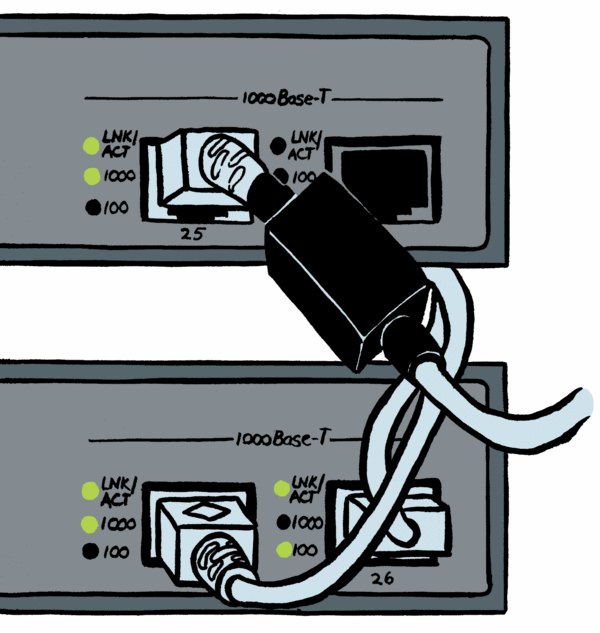
Category 5 cable, commonly known as CAT-5, is an unshielded twisted pair type cable designed for high signal integrity. The actual standard defines specific electrical properties of the wire, but it is most commonly known as being rated for its Ethernet capability of 100 Mbit/s. Its specific standard designation is EIA/TIA-568. CAT-5 cable typically has three twists per inch of each twisted pair of 24 gauge copper wires within the cable. Another important characteristic is that the wires are insulated with a plastic (FEP) that has low dispersion; that is, the dielectric constant of the plastic does not depend greatly on frequency. Special attention also has to be paid to minimizing impedance mismatches at connection points. In practice, this means that, when you attach connectors to the cable ends, you shouldn't untwist more of the cable than absolutely necessary.
When laying CAT-5 cable, you need a crimping tool, RJ45 jacks, and boots for the jacks.
The crimping tool is a clever piece of work. It combines the functions of a cable-cutter, wire-stripper, and a special grip specifically designed to fix the RJ45 jack to the cable. I'll explain them as I go through the steps of preparing a cable.
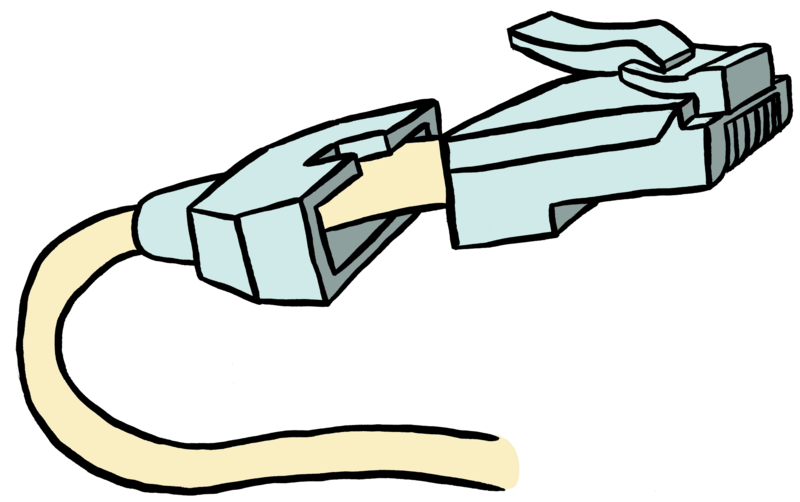

The first thing you need to do, is to cut the cable into the appropriate lengths, using the crimping tool's cable-cutter. To do this, measure the distance from the box where the switch will be installed to the furthest computer in each row. (Usually, in a tuXlab, there will be four rows of workstations.) It's easiest to use the cable itself for this, and to mark the length with a piece of masking tape.
To keep things organized, write something on the masking tape to identify the computer which the cable is meant for. Label the rows using a letter (so that you have rows A, B, C and D), and label each computer in a row with a number (so that you have A1 to A8, and so on). Once you have the longest cable in each row, you can figure out all the other lengths by shortening each subsequent cable with the distance between two workstations (normally, this will be 1200mm).
While you are cutting the cable into the right lengths, take care to keep the cables for each row together. Bind all the cables for a row together in a bundle, using masking tape. At the one end of the bundle (the switch end) all the cable ends will be together. On the other end, the ends will vary from the shortest to the longest.
Besides the cables from the switch to the workstations, you also need to cut a couple of flyleads. These are used to connect the server(s) to the switch, and also to link together multiple switches.
Once all the cables have been cut and gathered together in bundles, you can take them in to the lab. Put them on the ground underneath the desks, and ensure that the cables at the switch end can comfortably reach the switch.
If your network shares the same trunking with the electrical wiring of the lab, you MUST switch off the lab's power at the electrical subdivision board for the lab.
Now you need to put the cables inside the trunking. To do this, get as much help as you can muster, as it's hard work and no fun to do alone. Take the cover off the trunking. Note carefully where each workstation will be standing, and drill a small hole in the trunking below each workstation, for the CAT-5 cable to reach the workstation. While the cables and the covers are lying on the floor, thread each cable through the correct hole in the trunking (the cable for computer A1 goes through the hole for A1, and so on).
Once this is done, carefully put the cables inside the trunking and put the covers back on. Pass the cable ends up above the desks. You should have about 1m free cable for each workstation.
Stepping back, your lab looks the same as before, with the addition of cable ends emerging above the desks, and a whole bundle of cables terminating at the switch cabinet. Now you need to attach RJ45 jacks to the cable ends, so that they can be plugged into the switch at the one end, and into each workstation's network card on the other end.
To do this, complete the following steps for each cable.
Insert the 'boot' over the cable. This will cover the exposed wires where the RJ45 jack attaches to the cable wires.
Cut through the sheath around the cable to expose the pairs of coloured wires, without damaging them.
Untwist about 2cm of each pair of wires (no more, as this impairs the effectiveness of the cable for data transmission).
Arrange the wires in the correct colour sequence. (Straight-through cabling for cables between the switch and workstations, or Cross-over cabling for flyleads that connect switches, or that connect the switch to the server).
Insert the wires into the RJ45 connector. Push them up so that all the wires terminate right at the tip of the connector.
Check the colour sequence of the wires again.
Crimp the wires to the connector using the tool. You'll notice that the connector has copper strips along the top. These connect to matching strips in the plug of the workstation's network card or the switch. When you crimp the connector, it bites into the wires through their plastic covering, connecting its copper strips to the copper wire. This is why it's critical to push the wires right up to the tip of the connector, so that the connector's teeth find the wire.
Test the cable using a continuity tester, if you have one. If you don't, you'll just have to figure out whether it works by trial and error later.
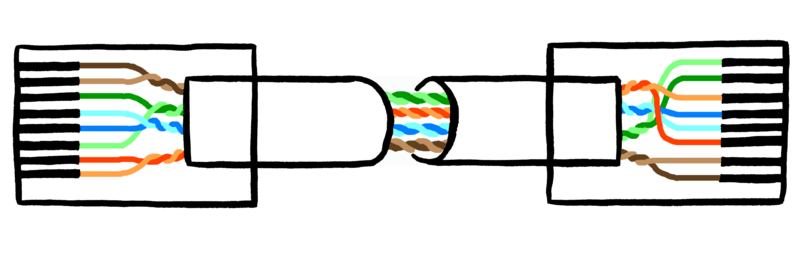
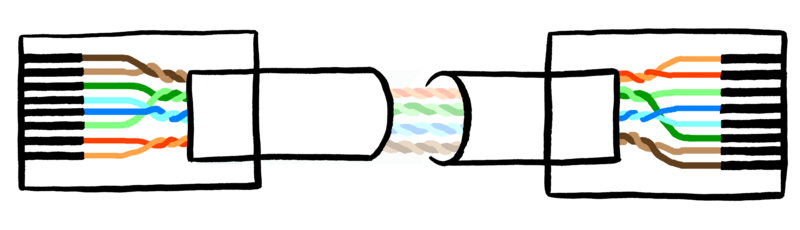
You have now constructed a local area network, or LAN. It's what gives your tuXlab life, but it stops at the classroom walls. To be able to send and receive email or access the Internet, it is necessary to connect to further networks. This happens over a wide area network, or WAN. A WAN is a computer network covering a wide geographical area. The grandest example of a WAN is the Internet.
WANs are used to connect local area networks together, so that users and computers in one location can communicate with users and computers in other locations. Many WANs are built for one particular organisation and are private; others, built by Internet service providers, provide connections from an organisation's LAN to the Internet. This is the case with a tuXlab that is connected to the Internet. Private WANs are most often built using leased lines. At each end of the leased line, a router connects to the LAN on one side and a hub or a switch within the WAN on the other. (XXX: diagram)
While a LAN is a network of computers and devices, a WAN is most often a network of networks. A router, or a computer configured to function as a router, on each network, connects to routers on other networks.
Behind every router there may be many computers (or networks) that are not directly connected to the Internet. It is then the function of the Internet gateway computer to route packets from outside networks to the correct computer on the inside. All the computers on a LAN share a single connection to the Internet. In the case of tuXlabs, the Wizzy server, if you have one, acts as a gateway computer.
However, because a permanent WAN connection is very expensive in South Africa, especially in rural areas where telecommunication infrastructure may be lacking, a tuXlab will connect to the Internet only intermittently. When it is not connected, the Wizzy server acts as a proxy for the Internet, serving cached requests, and queueing emails to send later when the connection is established again.
The network protocol of the tuXlab LAN is the same as that used for communication on the Internet, namely TCP/IP. This is the Transmission Control Protocol (TCP), encapsulated within the Internet Protocol (IP). The Internet Protocol takes care of routing data packets from a source IP address to a destination IP address. An IP address consists of four numbers that look like this: 192.168.10.200. IP packets can contain TCP packets. Whereas an IP packet only knows where it should go, TCP packets contain information about their position in a sequence of packets.
TCP is wonderful: it makes it possible to treat a flaky network as though it were perfectly reliable. When you send anything across a TCP/IP network (e.g. an email message, an image, or a document) it is broken down into many TCP packets. These are numbered and sent, one by one, to the destination computer. At the destination, the sequence number is used to put the packets in the correct order (as they may have become mixed up in transit). If there are gaps in the sequence, only those packets are requested again. If some packets are received more than once, the extra packets are simply dropped. Once all the packets in the sequence have been received, the entire file has been transfered successfully.
Unsurprisingly, an IP address cannot be just any four numbers. Actually, there is a lot of underlying structure. In the first place, the numbers are a sequence of four bytes. Computers generally handle data one byte at a time, so it's convenient to specify things as a sequence of bytes. A byte consists of eight binary digits. The binary number system has only two digits, namely 0 and 1: just as 99999999 is the largest number that you can express with eight decimal digits, 11111111 is the largest number that you can express with eight binary digits. If you convert that number to decimal, you get 256. For this reason, a sequence like 300.5.502.743 does not make any sense as an IP address.
In the second place, some address ranges are reserved. For example, all the networks that start with 192.168.---.--- as their first two digits are private, not routed on the Internet. The whole public IP address space is divided among ISPs. Each ISP gets a range of numbers that they may portion out between its customers. This range of numbers is described in terms of a netmask, a number which looks similar to an IP address, but is used to match all the IP addresses that belong to a particular network. Private networks can also be segmented into subnets using netmasks. Any computer on a network can send IP packets to any other computer on the network, but to send an IP packet to a computer on a different network, there must be a gateway computer which is configured to help the packets cross from one network to another.
Gateway computers also implement network management policies, e.g. by way of firewall software, that specify what traffic is allowed into and out of a network.
On a tuXlab LAN, there may be up to three important servers.
Most importantly, there will always be an LTSP classroom server, which serves the desktop sessions of all the client workstations.
If the tuXlab makes use of the Wizzy solution for Internet connectivity, there will be a Wizzy server functioning as mail server (using Courier for IMAP mail storage, and exim for sending and receiving of mail via SMTP) and web proxy (using wwwoffle). The address of this server will need to be configured in the mail clients and web browsers of all tuXlab users.
For mail clients (XXX: Thunderbird?), the proper ports on the Wizzy server needs to be configured as SMTP and IMAP server. This will normally be ports 25 and 143 of XXX.myschool.tuXlab.org.za. For web browsers, the Wizzy server needs to be configured as proxy server for all protocols (HTTP, SSL, FTP). wwwoffle, the proxy server, usually runs on port 3128.
If a local mirror of the Wikipedia project has been installed, it will be available as a website on the LAN, e.g. at XXX http://wikipedia.myschool.tuXlab.org.za/. As a website, it's served by apache, just like the administration pages of the Wizzy server. The Wikipedia and the mail server / web proxy server may be the same machine.
Table of Contents
A Wizzy server plays two roles. In the first place, it serves as an Internet proxy, serving cached pages to a lab without a permanent Internet connection. In the second place, it connects to the Internet and retrieves requested pages to store them locally, sends queued email, and fetches received mail.
These two roles don't have to be fulfilled by the same server: they may be split across two servers, for example if the school has no Internet access. In this case, there will be a Wizzy in the tuXlab and another one at a remote location with Internet connectivity.
The hardware requirements for the Wizzy server are far less than those of the classroom appplication server, since it has to do far less work. All it needs to do most of the time is to serve up saved pages from its hard disk. For this, a server with a 200+Mhz CPU, 256MB RAM, and a 40GB RAID 1 disk array is adequate.
The Wizzy server uses DHCP ( the section called “Dynamic Host Configuration Protocol”) and TFTP for booting, the same as the classroom server.
XXX: What does the Wizzy server use TFTP for? Does it also boot from the classroom server?
It uses the Lightweight Directory Access Protocol (LDAP) for authentication. When users access their email on the Wizzy server they will need to supply a username and password. This information is kept by an LDAP server, which maintains a directory where user information may be looked up. It is analogous to a telephone directory.
Ideally, there should be only one directory for a tuXlab, which contains the information on all the users and resources (such as printers) in the lab. Currently, however, the directory maintained by the Wizzy server is separate from the user database on the classroom server.
The Unix-to-Unix Copy Protocol (UUCP) is used for all email sending and receiving, as well as for fetching web pages. As long as a service can be configured to use UUCP for communication, it is possible to provide the service without a permanent Internet connection. For this reason, Wizzy sticks to UUCP.
The Wizzy server uses BIND (the Berkeley Internet Name Daemon) for domain name services (DNS), on the local network. DNS is how IP addresses, such as 192.168.0.254, are resolved to readable domain names, such as server.myschool.tuxlab.org.za.
XXX: I'm not sure what "on the local network" means here. Does that mean it only resolves names that are local to the tuXlab?
XXX: What domain name does a classroom server get?
For email, Wizzy uses the Courier IMAP server for inbound mail and webmail.
IMAP (the Internet Mail Access Protocol) provides a way for all kinds of mail clients (such as Thunderbird, or Mozilla's email component) to access a mail store. In Wizzy's case, the Courier package handles mail storage and IMAP access. Wizzy also provides a webmail client to access the mail store using a web browser.
To send mail, Wizzy uses the exim program.
As discussed in the section called “Wizzy server”, one of the most important jobs the Wizzy does is to provide a browsable offline copy of all the web pages that interest tuXlab users. It does this using the wwwoffle program to provide a local web cache. It augments wwwoffle (the World Wide Web Offline Explorer) with some custom programs, since Wizzy's disconnected mode of operation goes beyond the options offered by wwwoffle on its own.
The Wizzy server provides its administration functions as well as webmail as web pages, and uses the apache webserver to serve these pages. They may be accessed by going to XXX http://wizzy/ on the tuXlab LAN.
For a local FTP server, Wizzy uses XXX: vsftpd (XXX: but what is the local FTP server used for?)
In its role as a connection to the Internet, the Wizzy server can connect to any ISP with which the school has an account, in order to retrieve web pages. It does not, however, use any email facilities that the ISP may provide: all mail goes through Andy Rabagliati's server in Cape Town using UUCP.
For the sake of data integrity, Wizzy uses a RAID disk system for storage. RAID is a Redundant Array of Inexpensive Disks. It is a way to federate multiple hard disk drives in such a way that the failure of any one disk does not result in data loss.
The Wizzy project predates tuXlabs. It can also be configured to provide a similar range of application serving functions as the tuXlab classroom server provides. In this configuration, it uses the following packages:
Like the tuXlab server, Wizzy uses the LTSP packages ( the section called “Linux Terminal Server Project”) for its thin-client NFS-mounted root directory.
It also uses NFS (the Network FileSystem) for home directories that are NFS-mounted by the thin clients.
XXX: I don't know if I'm understanding this correctly. Does Wizzy mount the users' home directories from the classroom server, e.g. in order to server web pages from them?
Every computer on a local area network (LAN) needs to have a unique IP address (see the section called “TCP/IP”) so that it may send and receive data. The Dynamic Host Configuration Protocol (DHCP) is a networking protocol that allocates IP addresses dynamically to computers on a LAN. Without it, an administrator needs to give each client computer a static IP address manually. This may seem simple enough to begin with, but given time, it slowly turns into a nightmare: computers are added, removed or moved about, and the number assignments eventually become arbitrary and troublesome to keep track of. On a network with manually assigned addresses, it's also awkward to connect transient devices such as laptop computers that are also used on many other networks. You have to talk to the system administrator to find out the network configuration, and then check the network to find a free address. With DHCP, it's easy: just plug in an ethernet cable for the new device, and it will immediately request an IP address from the classroom server, which will assign an unused number to it.
In a tuXlab, the classroom server is configured as a DHCP server. A system administrator assigns a range of IP addresses to the server. Each client computer on the LAN has its TCP/IP software configured to request an IP address automatically from the DHCP server when that client computer starts up. The request-and-grant process uses a lease concept with a controllable time period. This eases the network installation procedure on the client computer side considerably.
In addition to the IP address, a DHCP server can set other configuration information, such as the address of the DNS server, the DNS domain of the client, and the gateway IP address, so that the client computer can be fully functional.
Before I continue, let me explain the concepts I've just introduced. First, the DNS domain: all Linux computers are given a hostname upon installation of the OS, which is used in system messages and configuration. When the computer joins a network, its hostname and the domain of the network together combine to form the Fully Qualified Domain Name (FQDN) of the computer. In the case of a tuXlab, the FQDN of each workstation will be something like XXX client1.myschool.tuxlab.org.za. The public DNS servers that resolve the domain names of tuXlabs on the Internet are maintained by SchoolNet http://www.schoolnet.org.za/schoolsurveys/suveys_index.htm
Secondly, the gateway IP address. In the section called “LANs and WANs” I explained that the Internet is a network of networks. For data packets from a computer on one network to reach a server on another network, there needs to be a gateway that is connected to both networks at once. Usually, the gateway computer will have a network card for every network to which it is connected.
By default, the LTSP server uses its first network card ( eth0, numbered from 0 like most things in the computer world) for the classroom LAN. It runs DHCP on this card, and automatically gives out IP numbers upon request. It then accepts BootP (Boot Protocol) and PXE (Pre-boot eXecution Environment) boot requests, and passes on the Linux kernel to the client using TFTP for the transfer. Once the client has received the kernel, it boots into Linux. The default dhcpd.conf file will support over 200 clients. The LTSP server will not answer DHCP requests over eth1 (with the default settings.)
The first network card, eth0, is the interface on the thin-client side of your LTSP server. This network card connects to your terminal hub. The 192.168.0.x address range is designated as a "private" IP range for internal networks. It is not routed on the Internet. IP traffic from your clients are routed to the Internet through eth1. (Note that if there is a Wizzy server, it will be the one with the two network cards.)
The classroom server has the last available address in this range, namely 192.168.0.254 ( 192.168.0.255 is the broadcast address: packets sent to this address reach all the computers on the network). The first client will be assigned an IP number of 192.168.0.253. [16]
(XXX: make a local one) Dialog (screenshot): http://www.k12ltsp.org/screen7.gif
When the tuXlab has a Wizzy server, there are a couple of other aspects to network configuration.
Protocols
Wizzy Digital Courier relies on standard networking protocols for the interactive portions, linked by UUCP for the intermittent sections.
Mail configuration
During installation, you must choose a hostname for the Wizzy server. This hostname will identify the server within the mail domain, which is wizzy.org.za (because Wizzy provides the email infrastructure), so that your complete mail domain becomes myschool.wizzy.org.za (where myschool is the hostname you chose). This means that all the tuXlab users will get email addresses like user@myschool.wizzy.org.za.
You will also need to contact Andy Rabagliati at XXX, to tell him your UUCP password, as he must set up mail routing for you.
For tuXlabs, Wizzy servers have a special configuration available --- accessible by typing the following at the Syslinux boot prompt:
boot: linux ks=cdrom:/tsf-ks.cfg
tuXlab uses NFS, the Network Filesystem, to make the home directories of lab users appear to be local to the client workstations, even though they really reside on the classroom server. The NFS configuration is specified in the file /etc/exports on the classroom server.
The LTSP configuration is specified in the file lts.conf on the classroom server. For more detail about this file, see the section called “Troubleshooting reference”.
Upon power-up, the BIOS of each client workstation contacts the classroom server, and retrieves the Linux kernel from it via the TFTP protocol. XXX: more detail.
All the users of the tuXlab will have accounts on the classroom server. (Additionally, if they have email they will have accounts stored in the Wizzy server's LDAP directory.)
XXX: who adds them? Root? Using some RedHat config tool?
Access to directories, files and executable programs under Linux is managed in terms of users, groups and permissions. Every user belongs to a group, and every file belongs to a user and a group. The basic permissions are read, write and execute. For every file and directory, these permissions can be set for the user who owns the file, the group, and for all others (i.e. everyone but the owner or the group). For example, here are the permissions of a user's home directory:
jean@klippie jean $ ls -ld /home/jean
drwxr-xr-x  112 jean     users        6664 Des 26 17:31 /home/jean
The permissions are shown by the string drwxr-xr-x. The first character, d, indicates that this is a directory. You should read the following 9 characters in groups of three, that show the permissions for the owner jean ( rwx), the group users ( r-x), and all others ( r-x). In this case, the owner has read ( r), write ( w) and execute ( x) permissions, while the group and others only have read and execute permissions. In the case of a directory, execute permissions means that you are allowed to access the contents of the directory. This home directory may therefore be read by everyone, but only the user may change it.
Here are the permissions on the file that contains the system user database:
jean@klippie jean $ ls -l /etc/passwd
-rw-r--r--    1 root     root         2118 Des  1 05:32 /etc/passwd
These indicate firstly that this is a regular file, not a directory (the leading -), and that the owner root has read and write permissions ( rw-), and everyone else have only read permissions ( r--). In effect, this means that only the root user may add, modify or delete users.
You may further note that the group to which this file belongs is also root. This group only has one member (the root user), and is used for files that are under control of only this unique user.
The importance of backing up a system can never be stressed enough. You never know when the power may cut out or the hard drive may crash. Even though you can restore the operating system from the distribution CD-ROM, there are other files that you need to consider. What about the configuration changes that you made? There are also files created by users, what about those?
Follow these steps to create a backup plan:
Make a list of the files and directories that you need backups of. You'll always want to backup system configuration files in the /etc directory, other configuration files may be found in /usr/lib. In addition, you may want to backup user files in the /home directory as well as the superuser ( root) files in /root.
Find a few tools to use when backing up and archiving files and directories. Several tools are available that will archive a group of files, and there are tools that will compress files and archives.
Decide how often the the system and individual files need to be backed up. How often do your files change? If files change frequently, the your backup frequency should match the change frequency. So, you may need to perform a backup every day. If you only make one or two configuration changes on occasion, you can easily backup the configuration files only when the changes is made.
Select a storage medium that will store the backup file. If you have a few files to backup, you could just store them on a floppy disk. If you have more files, or larger files, you can consider using a zip drive or a CD-RW drive.
Store the files in a safe place. The safest place to store the backup media is at a location different from where the the computer is located. To be really safe, this location needs to be protected from fire and other hazards. You may also want to keep a copy of the backup files close by so that you can quickly restore lost files.
Tip: Always make a copy of configuration files before you make any configuration changes. That way, should your new settings not work, you can restore the old configuration files.
On the homepage of the Wizzy server, accessible by browsing to the server using a web browser (XXX domain?), there is a form to request web sites for caching. Educators may preconfigure the server with a range of interesting websites, and learners may request new sites per email or in the classroom situation. When the Wizzy server connects to the Internet (directly, or indirectly via a counterpart in a remote location) it fetches the requested pages, and refreshes those pages which it should keep up to date.
All email and websites browsed by the tuXlab users during the day are served directly from the server in the classroom. This means instantaneous and constant connectivity to a local mini-internet over a top quality hardwired network. There is no waiting. [17]
Nothing will ever approach the importance of printed books for fostering a love to read. Only by curling up with a book somewhere safe and comfortable can your mind rise on the wings of the pages and take you to worlds beyond your own. Books are expensive and scarce, though. There are never enough copies. Furthermore, some books work very well in electronic form, especially reference works that you don't read from cover to cover. For these reasons, the Internet can be a wonderful addition to the school library.
If the Wikipedia has been installed, the Wizzy server will also serve a local mirror of it.
The Wikipedia is a one-of-a-kind collaborative effort to create an online encyclopedia. It is managed and operated by the non-profit Wikimedia Foundation. In addition to standard encyclopedic knowledge, the Wikipedia project has developed offshoots that include the kind of information associated with almanacs and gazetteers, as well as coverage of current events. With a little effort, it can be used offline in schools.
The Wikipedia is being written collaboratively as an open source project, using specialised wiki software called mediawiki. This means that anyone, including you, can make changes and add information. In fact, the openness of Wikipedia to local knowledge is one of its most important characteristics. For the first time, the world is being described not by an editorial committee but by a global community of volunteers, who are able to augment academic knowledge with local experience.
A wiki is a simple form of web-publishing that was thought up by a software design consultant called Ward Cunningham. His original wiki is still running at http://c2.com/cgi/wiki
In a wiki, every page is editable as plain text which is converted to HTML when served, following a number of simple conventions that convey the structure of the text. Specifically the convention for linking between pages is what gives wikis their identity. To create a link to another page, you simply write its title in a special format (e.g. AnotherPage), and if that page exists the title is turned into a hyperlink to it. If it doesn't exist, the title is turned into a link leading to a blank page where you may create AnotherPage instead. The mediawiki software also keeps a record of all versions of a page, so that the entire editorial history of a page may be examined.
For schools that don't have a permanent Internet connection, this entire resource, because of its Open Content licence, can be installed locally. Even for schools that are permanently online there are advantages to a local install, in preference to a wwwoffle mirror:
It's more effective, since it doesn't fetch all the HTML furniture (everything that repeats from page to page, such as the page header and footer) repeatedly.
It's complete. A wwwoffle mirror would contain only the articles that were requested, piecemeal.
It's searchable via SQL.
A local Wikipedia mirror does introduce some complexity though. In addition to apache, it requires PHP, Mediawiki and mysql. [18]
Project Gutenberg was started in 1971 by Michael Hart, with the goal to provide books electronically at no cost.
Their collection numbers more than 13,000 e-books, produced by hundreds of volunteers. Most of the Project Gutenberg e-books (but not all) are older literary works that are in the public domain in the United States. [19] All may be freely downloaded and read, and redistributed for non-commercial use (for complete details, see the license page).

The Connexions project of Rice University is an endeavour to create open source course material. On their homepage, they state: "Knowledge should be free, open, and shared. Connexions is a rapidly growing collection of free scholarly materials and a powerful set of free software tools to help authors publish and collaborate, instructors rapidly build and share custom courses, and learners to explore the links among concepts, courses, and disciplines.
They provide small "knowledge chunks", called modules, that connect into courses. Thanks to an open license, anyone can take these materials, adapt them to meet their needs, and contribute them back to the Commons.
[19] Incidentally, this emphasizes the importance of a public domain. Current legislation in the United States effectively allows work to be kept out of the public domain indefinitely. This is bad news for future generations.
Table of Contents
This is just a very quick overview of a few of the educational software packages that may be suitable for use in schools.
XXX: which of these are in the tuXlab distro?
The KDE project comprises many subprojects that cover a wide range of computing areas, from office applications to development tools. One of these projects, the KDE Edutainment project, has education as focus. [20]
The software is divided into categories. Currently, these are Astronomy, Chemistry, Languages, Mathematics, Miscellaneous and Planning. Astronomy contains the very extensive program KStars which shows the starry night sky with some 10 000 objects. The application Kalzium belongs to Chemistry category, and offers an informative and clear presentation of the Periodic Table of the Elements. In the Languages section are many programs that let you practice a specific language, or that help you to learn expressions in other languages. KHangMan and KMessedWords are games which let children learn new words while playing. In the Mathematics category, we find KGeo, a program for the presentation and construction of geometric drawings.
Here are some more detailed descriptions of some of the packages:
- Ghemical --- Modelling and computing molecules
Ghemical is a free program for chemistry, which allows you to model and compute molecules relatively easily.
- Tuxpaint --- Painting is fun
Tuxpaint is a free painting program for children.
- GCompris
GCompris lets a learner practice various skills. One module lets you practice reading clocks and telling the time, another offers a simple vector-based painting program, and a third teaches you where the different countries are situated in North and South America.
- Kalzium
Kalzium --- The Periodic Table of the Elements (PTE) allows you navigate the periodic table. All the known elements are listed simply and clearly, and more information about the selected element can be shown.
It also offers a view that lets you go back in history, so that you can see which elements were already known at which point in time. Another view lets you can select the display according to the state of matter, so that you may explore which element are vapor, liquid or solid at which temperatures.
- Klicker
Klicker, the KDE metronome, provides visual and sound beats. It is becoming a more general music helper application with a tuning helper, a voicing component, a chords trainer and more.
- KLogoTurtle
KLogoTurtle is a Logo interpreter for KDE. It helps to teach computing and mathematics to beginning programmers.
While Logo is a general programming language, it is especially well known for its "turtle graphics": programming concepts are taught by giving instructions that move a marker called a "turtle" across the screen, drawing lines as it moves. While many programming languages make it complicated to interact with graphics on today's sophisticated computers, Logo sees to it that the learner has an immediately responsive drawing board to play with.
If you're interested in learning Logo, you should note that Brian Harvey has made his famous series of three programming texts freely available for personal use from his homepage. They are:
Symbolic Computing, a Logo programming text that concentrates on natural language processing rather than the graphics most people associate with Logo.
Advanced Techniques, in which discussions of more advanced Logo features alternate with sample projects using those features, with commentary on the structure and style of each.
Beyond Programming, brief introductions to six college-level computer science topics.
- KGeo --- Geometry with the mouse
KGeo is a free geometry education program which recently became part of the KDE Edutainment project
When the program first starts, you are presented with the main window and function panels at its sides. The main window is a construction board for geometric shapes, complete with a coordinate system. The function panels are laid out to be clear, and not overloaded with functions. Apart from the menu, there are five panels which the user may arrange themselves. Three of these panels are used for the construction of geometric shapes, another one contains functions for measuring and calcuating lengths, areas, and so on, and the last one contains functions for moving or erasing shapes.
When the user works with KGeo, he is always in one of three modes: drawing, dragging, or tracing. In the drawing mode, you can draw geometric shapes and their attributes such as points, triangles, vectors, centres, parallels and angles. By combining these shapes and drawing methods, you can even construct reflections, translations or rotations. You can explore the shapes using tools to measure the circle areas, distances, angles, slopes or circumferences. All drawing buttons have an information window that appears when you hover over them with the mouse.
There are numerous sources of educational software on the web. Some starting places are:
Schoolforge. Schoolforge's mission is to unify independent organizations that advocate, use, and develop open resources for primary and secondary education.
Edu-SLUG, the workspace of the Schools Linux User Group, for the creation of educational software for South African schools.
You may find an informal collection of links loosely related to the tuXlab project at del.icio.us, where you may register and post your own extensions to the list.
Table of Contents
In this section, I will briefly touch on some more advanced topics that you may want to investigate as you become familiar with your tuXlab. The notes here serve only as hints. Contact the tuXlab helpline if you want to explore the ideas here further.
A tuXlab may easily be accommodated within an existing Windows network. If you want the Windows workstations to double as thin clients in your tuXlab, see the note about dual booting in the section called “Thin Client configuration”. If the tuXlab is a separate lab, you can set it up as usual, but the second network card in the classroom server can act as a bridge to the Windows network. Alternately, only a Wizzy internet proxy can be introduced to an existing Windows lab, to provide offline internet access. This is outside the scope of the Shuttleworth Foundation's Open Source mandate, however.
Using affordable wireless technology, it is possible for nearby schools to create direct links between their tuXlab LANs, binding them into a WAN without exposing them to the Internet or incurring ISP costs. Computers at home for teachers or learners may be connected to the tuXlab LAN in the same way. Note that to enable authentication and security for wireless access, the connection needs to be established using PPPoE: the Point-to-Point protocol tunneled over Ethernet. This is because PPP offers some features that Ethernet doesn't, specifically authentication and access control.
After the resources mentioned in the section called “Steps involved in getting a lab” and the other schools in your tuXlab cluster, your local Linux users' group is a good place to turn with your questions. With some patience, politeness and carefully formulated questions, these groups are inexhaustible founts of expert knowledge and assistance. By the time you have run out of questions to ask, there will be many newbies asking questions that you will be able to answer! In the Cape region, try the Cape Linux Users' Group, and in the North, try Gauteng Linux User Group.
While writing programs for your own edification and amusement does have its own appeal, sooner or later you'll want to share. Here, the system administrator has a couple of options.
If the home directories of learners on the classroom server are left world-readable (i.e. everyone, or at least every learner, with an account on the server is able to see the contents of someone else's files), then learners need only tell their classmates the location of their scripts for them to be able to find and run them. As long as they don't have write access to each other's directories, they'll only be able to delete their own files. [21]
Alternatively, the system administration team could put scripts into a directory where everyone has execution rights after auditing the code themselves. While this may be a bit safer, it is likely to be an inhibiting factor.
A third possibility is to let learners write CGI scripts that are called from web pages served by the classroom server. This can be a fun way to see one's code in use by one's peers.
[21] Of course, it's always possible to trick someone into running a script that will damage their data. This is how many viruses work. Rather than trying to manage this through technology, in the classroom situation it's probably better to teach learners that it's better to help one another (and keep backups in case things go wrong).
Table of Contents
- Introduction
- Basic overview
- Troubleshooting common tuXlab problems
- Thin client stops at "Searching for DHCP"
- Thin client stops at "Loading vmlinuz.ltsp..."
- Thin clients have grey screen showing only an X cursor
- Thin client displays message "Link cable error"
- Thin client screen goes black or fuzzy at startup
- Thin client freezes / reboots regularly
- Mouse doesn't move
- Keyboard doesn't work
- Known issues
- Troubleshooting reference
- Further reading
Welcome to the troubleshooting part of the cookbook. It is aimed at the tuXlab administrator who needs to find a quick solution to a common problem.
[22]Administrators are encouraged to involve their entire computer committee when troubleshooting issues. This will facilitate a skill transfer process that will improve the sustainability factor of your tuXlab.
In this section, this guide provides a basic overview of how the tuXlab works on both the hardware and the software side, which should give you at least a vague idea of where the problem might lie.
In the section called “Troubleshooting common tuXlab problems”, problems are listed by symptom, which allows you to quickly find the section relevant to you. Most of explanations in this section refer to common tasks performed by tuXlab administrators. Instead of explaining these tasks in every part, it refers to the the section called “Troubleshooting reference”, where you can also find a walkthrough for the lts.conf file.
In this section, you can find more information on known issues that need to be worked around. This will typically be issues that need to be solved by the developers of some software package installed in a tuXlab, or limitations of the hardware in use.
the section called “Further reading” contains an explanation of the tuXlab support process, so that the tuXlab administrator knows when to contact the appropriate person/organisation.
If anything in this document is unclear, remember that you may phone the tuXlab help desk on 0860 67 4357 for further information and explanations. They will also be able to log requests if you need any forms (such as the hardware order form or a tuXlab audit form).
Your tuXlab uses a star topology. This means that every thin client connects directly to the switch, giving it a fast connection to the tuXlab server. In other topologies, such as ring topologies, messages are passed on from computer to computer. Star topologies are the fastest, and are best suited for thin client computers.
In the diagram below, you will notice that all the thin clients, as well as the server, connect to the switch using CAT-5 cable. The server connects to a special high-speed port on the switch, called the "Gigabit" port. It has ten times the data throughput of the other ports, allowing computers to have fast access to the server. This is necessary because all the clients are constantly talking to the server, and not to each other.
If your lab has an Internet or e-mail setup, your server will also be connected to a gateway computer. This computer will dial up at night to collect your email and off-line content. The gateway computer will have a modem attached, that converts the sounds from your phone line to digital signals that your computer can understand, and vice-versa.
With troubleshooting, more than half the work is actually identifying the problem. Once you have a good overview of how things fit together, it is easier to locate the cause of the problem.
Thin clients rely on a network connection to work, so if all the computers fail to start up, you might want to check if the networking switch is turned on, or that the server is properly connected to a switch. If only one computer fails to start, it might be a problem with the cable connecting that computer to the switch. To make sure of this, plug this cable into a computer that starts successfully. If it stops working while using this cable and resumes working normally when the original cable is replaced, you know that the problem lies with the cable.
To fix the cable, you can try crimping the cable ends again. Examine both the switch end and the workstation end of the cable, making sure that all the copper wires in the CAT-5 cable are pushed up right to the end of the cable. If you notice something wrong, cut the cable a couple of centimeters beyond the RJ45 jack, and proceed as in the section called “Building the network”
XXX: diagram
As soon as you switch on a thin client, it does a Power On Self Test (POST). This is the part where you normally see numbers counting, and a prompt to press F1, F2, or DEL to enter setup.
After the POST is completed, control is given over to your network card's boot PROM (Programmable Read-Only Memory). This is a small piece of memory on the network card that allows a computer to boot from the network. The two methods of booting off the network are called Etherboot and PXE (Pre-boot eXecution Environment). If you see one of these words, then your network card is configured.
If your network card detects a connection to a switch, it will attempt to search for the server using DHCP. DHCP is the thin client's way of screaming "I am here! Please find me! Give me an address so that I can boot up!" The server will then give the thin client an address, called an IP (Internet Protocol) address. If a thin client is stuck at this point, it often means that the switch is on, but the server doesn't respond, or is not plugged in, or DHCP is not running on the server.
DHCP tells the thin client that it should use FTP (File Transfer Protocol) to download the Linux kernel (a file called vmlinuz.ltsp) from the server. If a thin client gets stuck here, it's often a problem with the FTP server or a firewall blocking the FTP port. Perhaps the FTP server is not being started automatically?
The next step is to gain access to a filesystem on the server over NFS (Network File System). This is the filesystem that all thin clients use to boot Linux after the kernel load, and can be found on the server at /opt/ltsp/i386.
XDMCP is the X Display Manager Copier. It sends the graphical user interface (GUI) from the server to your thin client. If XDPCP doesn't start, it's often because GDM (Gnome Display Manager) isn't starting up. This is normally where the problem lies if you get a grey screen with an X cursor.
Thin client stops at "Searching for DHCP...".
Possible causes:
DHCP server not running
Server not connected to switch (either the cable is not plugged in, or it's faulty)
TuXlab server not powered up
If the DHCP server isn't running, you can restart it by opening a terminal, logging in as root, and then typing in the following:
#/etc/init.d/dhcpd restart
Stopping DHCPD                      [FAILED]
Starting DHCPD                      [SUCCESS]
In the transcript above, you'll notice that the attempt to stop the DHCP server failed. This means that it wasn't running when you attempted to boot.
Check if the green light is burning on the network card on the server. You can also check for a connection on the switch on the appropriate port. In some cases, it works better if the server is connected to a specific port (some switches have two gigabit slots). If only one thin client has this symptom, check that the connection light is burning on the network card. Sometimes all that's needed is to press the "Esc" button on the thin client's keyboard.
Check that the server is powered up. If the previous steps failed to solve your problem, attach a display, keyboard and mouse to your server to see any possible error messages.
Thin client says "Loading vmlinuz.ltsp..." then stops.
Possible causes:
TFTP Server is not running
Firewall is blocking TFTP port
Trivial File Transport Protocol (TFTP) is used to download the Linux kernel to the thin client. It is started by a service called xinetd. Try to restart the server as root:
#/etc/init.d/xinetd restart
Stopping xinet                      [SUCCESS]
Starting xinetd                     [SUCCESS]
Disable the firewall (as described in section XXX). Otherwise, you need to reconfigure your firewall to open the TFTP port.
Note: If your classroom server connects directly to the Internet (without using a gateway machine), the firewall needs to be enabled. This will only be the case in a non-standard tuXlab that you may have modified yourself. Normally, the classroom server will not connect directly to the Internet, but will go through a Wizzy server.
Thin clients display grey screen with an X for a mouse pointer instead of login screen.
Possible causes:
XDMCP is disabled
GDM is not running
Thin clients are connecting to wrong server
Check if XDMCP is enabled. To do this, go to the server (you may have to connect a display, keyboard and mouse), and click on the main menu button on the bottom of the screen. Go to the System Settings menu, and choose "Login" to modify your login settings. You will have to enter the root password. Then, click on the "XDMCP" tab, and ensure that the box that says "enabled" is selected.
Check if GDM is running. You can gain access to the server by using a secure shell from one of the thin clients (refer to the section called “Using a secure shell from one of the thin clients”). To check if GDM is running (once logged in), type:
#ps -e | grep " .dm"
If GDM is running, you will see an output similar to this:
1973 ?      00:00:00  gdm
3226 ?      00:00:00  gdm
If GDM is not running, or if you'd like to restart GDM, you can type:
#gdm-safe-restart
The server to be used for LTS (Linux Terminal Services) is specified in the lts.conf file using the "server" directive. This value is normally 192.168.0.254, but may be different depending on your specific setup:
#from lts.conf:
server = 192.168.0.254
If you have more than one tuXlab server, or if you have more than one computer network in your school, then this address might have to be slightly different.
Thin client does not connect, and complains about cable error.
Possible causes:
Networking switch is switched off (in which case no clients will be able to connect), or faulty
Cable is not properly crimped
Cable is broken at some point
Check that the switch is powered up. If none of the lights are on, or they don't flash, then the switch might be faulty. In this case you need to consult with neighbouring schools and, if necessary, the tuXlab helpdesk. If the switch is less than a year old, then it is still under guarantee, and it needs to go back to its supplier. The Shuttleworth Foundation will arrange a loan switch, if possible.
If the cable isn't properly crimped, you need to cut the network point off, and recrimp it. If you do not have a crimping tool of your own, consult with a neighbouring school.
If the cable is damaged at any point, it needs to be replaced.
Thin client starts up normally, and displays text on screen, but as soon as the graphical login manager starts, the screen goes blank or fuzzy.
Some screens have trouble displaying resolutions of 1024x768, and you might need to set it down to 800x600. We do not recommend using 640x480, and if it can only handle that resolution, we consider it faulty.
To change to the correct display driver, you need to know which type of display card the thin client has. The best way to determine this is to open up the box and take a peek. The name of the card will be written on a black chip on the display card. If it's an on-board card, it will often be the chip closest to where you plug in the monitor. [[XXX: A couple of example images and names would be cool.]]
Thin client settings are all stored in a file called lts.conf. The full path to this file on the server is:
/opt/ltsp/i386/etc/lts.conf
You can edit this file with a plain-text editor of your choice (such as vim, gedit, kate, etc.). At the very bottom of this file, you can configure individual thin clients such as the following example:
[A1:00:08:53:F1:01]
    XSERVER  = cirrus
    X_MODE_0 = 800x600
The line in brackets is the thin client's unique network address. This address is called a MAC address, and is determined by the network card. You can find out what the MAC address of a workstation is by pressing CTRL-ALT-F2 on the thin client to get a text console terminal session, and then typing in:
#ifconfig
This will give you information such as the following:
eth0      Link encap:Ethernet  HWaddr 00:10:A4:7B:A7:CC
        inet addr:192.168.0.50  Bcast:192.168.0.255  Mask:255.255.255.0
        UP BROADCAST RUNNING MULTICAST  MTU:1500  Metric:1
        RX packets:0 errors:0 dropped:0 overruns:0 frame:0
        TX packets:0 errors:0 dropped:0 overruns:0 carrier:0
        collisions:0 txqueuelen:100
        RX bytes:0 (0.0 b)  TX bytes:0 (0.0 b)
        Interrupt:11 Base address:0x4c00
In the above, the MAC address is called HWaddr, and is 00:10:A4:7B:A7:CC.
After saving the lts.conf file on the server, you can press CTRL-ALT-F1 (to go back to the graphical console), and then CTRL-ALT-BACKSPACE (to restart the X server) to test your setting.
The XSERVER directive specifies what driver this machine should be using. In this case, it's a generic Cirrus Logic display card. If all fails, you might want to try a vesa driver, which is a very generic display driver that should work with most display cards.
The X_MODE_0 directive specifies which resolution this thin client should use. If the resolution is too high, text will become too small. Your ideal resolution should be 1024x768, followed by 800x600.
Thin clients kicks user out or freezes when under load, especially when using software such as Mozilla or OpenOffice.org.
Thin client runs out of memory
Thin client may contain faulty RAM modules
Thin client may have cooling problems
Enable swap over NFS. In most tuXlabs, this should already be enabled. To check, press CTRL-ALT-F2 (from any thin client after logging in), and then type:
gedit /opt/ltsp/i386/etc/lts.conf
Scroll down, and check that the file contains the following lines under the [defaults] section:
ENABLE_NFS_SWAP = Y
SWAPFILE_SIZE   = 32m
Swapfile size should be a minimum of 8Mb, but at least 16Mb is recommended. Since we have lots of disk space on the server, we can make it 32Mb. When a thin client runs short on memory, it will use swap space over the network system to avoid running into problems.
Check for faulty RAM modules. The best way to do this is to remove the memory modules from one thin client, and swap it with another. If the other thin client gives problems, then you know it is due to faulty RAM.
Check the cooling of thin client. If the CPU overheats or there are critical fans that are faulty, then it needs to be replaced.
If you replace a PS/2 type mouse with a serial mouse, then you need to specify this change in your lts.conf file (editing lts.conf is explained in the section called “Thin client screen goes black or fuzzy at startup”).
For serial mice (D-shape connector):
[00:08:A1:48:F1:08]
    X_MOUSE_PROTOCOL = "microsoft"
    X_MOUSE_DEVICE = "/dev/ttyS0"
In some cases, ttyS0 might have to be ttyS1. If you have used serial mice in Windows before, then you will know ttyS0 as com1 and ttyS1 as com2.
For PS/2 mice (small, round connector):
X_MOUSE_PROTOCOL = "PS/2"
X_MOUSE_DEVICE = "/dev/psaux"
If it's a PS/2 scroll mouse, you can change "PS/2" to "IMPS/2", although this might not work on all configurations.
Check that the mouse and keyboard are plugged into the correct port. On most computers, the keyboard should be plugged into the bottom socket (purple), while the mouse is plugged into the top socket (green).
Check that the pins on the keyboard are not bent. If the keyboard is damaged, it should be replaced.
Please refer to step 2 in the section called “Mouse doesn't move”.
Thin clients, being network computers, have limits on what they're capable of. It allows easy administration, and maintenance, but it has the following limitations:
3D graphics are slow/unusable
Full motion video playback is not possible on all the thin clients at the same time
OpenGL drivers are not available for older display cards
Software that uses lots of moving graphics do get slow
Some of the software we install is very new, and may still be under development. In this section, we list the software that we know have issues.
GCompris is a relatively new piece of software, and in some parts of the program, it might kick you out of the program. GCompris is a great piece of software, especially with the lower grade students, we've included it for the parts that do work. We encourage teachers to inform our help desk of specific GCompris issues. We can then compile a list of issues experienced, and forward it on to the GCompris developers.
These are games that require a 3D graphics or OpenGL graphics. They are not supported on thin clients and we recommend that you remove these two games from your system.
To remove Tuxracer and chromium from your system, click on the main menu button on the bottom of your screen, point to "System Settings" and choose "Add/Remove Software". There you will have the option to remove this software under the Games section.
Simply put, a terminal is a place where you can type instructions for your computer. Terminal access is often the easiest way to adjust a wide variety of settings in your tuXlab.
There are several ways to gain access to a terminal. In the following, we'll show a few of the ways.
If you're already logged in, you can right-click on your GNOME desktop and click on "Open Terminal" or "New Terminal" (depending on the version of GNOME you are using). This will open a new terminal window on your desktop.
Sometimes, it's not possible to log in using a normal account from a thin client machine. If this is the case, you might want to use a console terminal on the server. In order to do this, you need to have a display and keyboard attached to the server. To access a console terminal on the server, press CTRL-ALT-F1. You can then log on as root from there to change settings. To return back to the graphical user interface, press CTRL-ALT-F7. If you don't have a display and keyboard attached to your server, and your thin clients can still start up, you might want to access the server with a secure shell as described in the next section.
Thin clients are generally just connections to the server, but each thin client also runs its own little Linux system (once it has booted up) that you can use to access the server. To gain access to the Linux system, press CTRL-ALT-F2 on any thin client. To connect to the server from a thin client, type:
#ssh server
The authenticity of host 'server (192.168.0.254)' can't be established.
RSA key fingerprint is 9e:8e:0e:9a:88:b9:a0:1e:0c:80:15:41:54:47:dd:fa.
Are you sure you want to continue connecting (yes/no)?
You will then see a message warning you about a RSA key, this is normal. Type "yes" and press enter. You must then enter the server's root password and press enter again. When you're done, you can press CTRL-d to exit the secure session, and ALT-F1 to return to the thin client's graphical user interface.
There are two types of users: those who have forgotten their password, and those that will forget their password. This is often the case for system administrators as well.
To reset your root password, you'll need:
Physical access to your server. Note well that anyone with physical access to your server can reset the root password, so take care to keep it locked up.
A keyboard and display attached to the server.
Resetting your server in 4 easy steps:
Restart the server
When the GRUB [23] screen is displayed, press the e button on your keyboard, then the Down arrow button, then e again. Then press the end button, type in a comma, a space and the letter s (so that it's ", s" at the end of the line) and press the b button twice. This will boot you into single user mode.
Once the server has started into single user mode, type in:
#passwd
Enter new UNIX password:
Retype new UNIX password:
passwd: password updated successfully
After typing passwd, enter your password, and then re-enter it. Your password (or password length) will not be displayed on the screen for security purposes, in case someone is watching over your shoulder.
The lts.conf file stores information about your thin client setup. Generally, thin client settings are detected automatically. However, there are times when you want to adjust certain settings manually. Remember to make comments when you change settings (it will make it easy for other people to troubleshoot the system). Comments are any lines in your lts.conf file that start with a #.
This is where all the default settings are stored that applies to all your thin clients:
[default]

SERVER = 192.168.0.254
XSERVER = vesa
#used to be s3, changed to vesa on 10 December 2004 by Jonathan
In the section above, the LAN IP address of the Linux terminal server is set to 192.168.0.254, and the default display driver for thin clients is set to vesa. The last line is a comment, which explains that the setting has changed from s3 to vesa. Whenever possible, try to put reasons for the changes in your comments as well, as well as identifying yourself and the date of the change.
X_MOUSE_PROTOCOL = microsoft
X_MOUSE_DEVICE = /dev/ttyS0
X_kb_Symboles = us(pc101)
X_kb_Layout = us
The X_MOUSE and X_kb section sets the default keyboard and mouse settings for all the thin clients. Refer to the section called “Keyboard doesn't work” for more information on changing pointing device settings.
USE_XFS = N
LOCAL_APPS = N
SCREEN_01 = startx
SCREEN_02 = shell
USE_NFS_SWAP = Y
SWAPFILE_SIZE = 24m
- USE_XFS
Specifies whether we want to use an X font server or not. We generally say N for no here.
- LOCAL_APPS
Specifies whether we want to use thin clients to run their own programs. This can be handy if you have powerful thin clients (Pentium 2 or better), because it takes load off the server, and can cause programs to run faster. Even though this can cause huge performance increases, it's lots of work to set up, and is still quite experimental. Future versions of LTSP will use local applications more as it matures and as hardware improves.
- SCREEN_01 and SCREEN_02
These settings explain what we want to run on our thin clients. In this case, we will run our graphical user interface on the first screen of our thin clients, while we run a text mode shell on the second screen. To switch between screens on the thin clients, press CTRL+ALT+F1 for screen 1, and CTRL+ALT+F2 for screen 2.
- USE_NFS_SWAP and SWAPFILE_SIZE
These are used to set up swap files for the thin clients on the server. When a thin client runs out of memory, it will use disk space on the server for extra swap memory. Enabling swap over NFS greatly improves thin client performance as well as stability. If SWAPFILE_SIZE is set too high, then there will be a waste in hard disk space and some loss in performance. It is recommended that you use a swap file of 8-32MB. 24MB generally works well.
RCFILE_01 = usb
RCFILE_02 = floppyd
RC (Run Command) files are scripts that are started up when the thin clients boot. usb and floppyd allows thin clients to connect to local devices using mtools (a set of programs that allow you to use floppies formatted as VFAT, the Windows disk format, without needing to mount and unmount them). If your thin clients have floppy drives, it's strongly recommended that you enable the floppyd script.
SOUND = Y
SOUND_DAEMON = esd
# SOUND_DAEMON = nasd
VOLUME = 75
SMODULE_01 = sb io=0x220 irq=5 dma=1
If you want to enable sound on the thin clients, then SOUND needs to be set to Y and it needs to be uncommented. SOUND_DAEMON selects the sound server to be used. Normally, only one of the two will work. The best way to set it up is to try the one, and if it doesn't work, try the other one. SMODULE_01 selects the driver module you want to use with the thin client's sound card. Generally, sb will work with most sound cards. [[XXX: How are the io and irq parameters determined?]]
#60 hz resolutions:
X_MODE_0 = 1024x768 65 1024 1048 1184 1344 768 771 777 806 -hsync -vsync
You will normally find a whole bunch of mode lines like the one above in your lts.conf file. X_MODE_0 specifies the resolution your thin clients should use. 1024x768 at 60hz is usually the best choice.
To change the resolution of one specific thin client, you can refer to it by its MAC address:
[00:08:A1:F1:EE:01]
    X_MODE_0 = 800x600
    LOCAL_APPS = N
    USE_NFS_SWAP = N
The numbers between brackets is the thin client's MAC address. This is the unique address of each thin client determined by the thin client's network card. X_MODE_0 specifies the screen resolution. LOCAL_APPS is disabled for this thin client, as well as swap over NFS. Any of the settings in the [default] section can be applied to a specific thin client as well.
The tuXlab support process is fairly simple. The support process poster in your tuXlab explains the steps:
Inform your computer committee that you have a problem. It's important that everyone in your computer committee knows what's going on in your lab. If a representative from SLUG or the foundation phones your school, they will ask to speak to a tuXlab computer lab committee member.
Open up your logbook and note the problem in your logbook. This allows you to keep a record of problems that have been experienced in your lab, along with the solutions. If you or a school in your cluster experience the same problem again, you'll have a reference to fall back on.
Allow staff and students and your facilitator to try and identify what the problem is. For your tuXlab to be truly sustainable, you need to have as much local skills as possible. To promote your own skill levels, you have to try and solve as many problems as you can yourself.
Contact the schools in your cluster to find out if they know a solution to your problem. If a neighbouring tuXlab family school have experienced a similar problem, they will be able to assist you with your problem. If you get stuck, mention your problem at your next cluster meeting, or phone the schools directly and speak to their tuXlab committee.
If no solution has been found, contact the tuXlab help desk at 0860 OS HELP (67 4357). The help desk also keeps track of problems in tuXlabs, as well as other general requests. You may also phone the help desk at any time for help on any problem or help that you may need in your tuXlab. They will provide you with telephonic support.
Contact SLUG, the Schools Linux Users Group, a volunteer group who are very much dedicated to the tuXlab project. They can generally be reached via email. For more information, see http://www.slug.org.za.
These are students and volunteers who assist schools with setting up their tuXlabs. They also assist schools after the labs have been installed. In return, they are incentivised by the Foundation with training and certification exams.
If no solution was found using these steps, you can contact Jonathan Carter at the Shuttleworth Foundation on (021) 970 1230.
This is your last resort help line. If no one else can help you, you have to phone Jonathan with a detailed explanation of your problem.
If you experience any hardware problems, it's generally a good idea to skip ahead to step 5 and phone the help desk, since other tuXlab schools might not always be able to help you there. Most tuXlab cluster leaders will have spare parts with them, contact your cluster leader to find out if they have any spares.
If you'd like to buy additional hardware for your tuXlab, or if you need to replace faulty equipment of which the guarantee has expired, you can source hardware from the following suppliers:
Rectron: (021) 555 7111
For better pricing, you may order server hardware from Rectron via the Shuttleworth Foundation.
Scoop distribution: (021) 555 4740 (Neal Andrews)
Scoop distribution supplies networking equipment such as switches, cabling, crimping tools, RJ45 connectors and boots.
These are just pointers to sites on the World Wide Web where you can read more about some of the topics mentioned, and where you can search for further information.
Google has a section dedicated to Linux related questions: http://www.google.com/linux
The LTSP project homepage. This is the distribution from which K12LTSP is derived.
The LTSP Wiki. A wiki is kind of site that's easy for visitors to edit. The name apparently means "quick" in Hawai'an, and it's intended to convey the informality of the typical wiki. It's often used to collect user-contributed documentation.
The Linux questions forum, where you may submit questions to be answered by other members of th e community. Remember to RTFM first!
The Linux Documentation Project (TLDP). This is a magnificent collection of documents that range from short HOWTOs to full-length books on all aspects of Linux system administration.
[22] This section incorporates the tuXlab Troubleshooting Guide by Jonathan Carter (version 1.0, December 2004).
[23] GRUB is the Grand Unified Bootloader, so called because various alternatives existed with different strengths and weaknesses. GRUB was written to try and take the best from them and make the choice of a bootloader less of an issue.
Briefly, the bootloader is the first software program that runs when a computer starts. It is responsible for loading and transferring control to the operating system kernel (see the section called “What is an Operating System?”). You can read more about GRUB in the FSF software directory.
Table of Contents
Newer versions of all the software components of the tuXlab will be released from time to time. Often this will simply be the result of ongoing work to improve the software, but from time to time bugs will be discovered that represent security risks.
As a rule, only tuXlab system administrators will be able to perform software updates on the classroom server. Care should be taken when upgrading software, as it is possible to break things by installing incompatible versions of programs or by uninstalling packages that you really need.
Not all upgrades fall into the same category, and they should be approached differently.
There are application upgrades or new installs, when you want to offer a new program or updated version to your users. This can usually be done easily using RedHat's package management facilities (called RPM), and need not impact core system components.
There are upgrades that fix security issues. In a trusted environment that is not directly exposed to the Internet, such as a tuXlab, many of these will not be as critical as they would be in an open environment. The risk of upgrading system software on the classroom server should be weighed up against the importance of the fix. Another consideration is that support from the other tuXlabs in your cluster will be more effective if all the labs have the same configuration, as far as possible.
As long as the Wizzy server functions as it should, its software should not be upgraded. It should simply keep on running forever with no need for maintenance. Considerations that should be kept in mind with the Wizzy server are: it needs to communicate with a remote counterpart and should therefore remain compatible with it; it contains customizations that are not part of the distribution's package management system and that therefore need to be upgraded manually.
When you do want to upgrade software, there are various ways of going about it. The two main options are as follows:
In the first place, you can get the source code from the author's site. In this case, you would have to configure, compile and install it locally. This should not be necessary unless you have specific reasons to do it.
In the second place, you can get the precompiled package for the software from one of RedHat's distribution sites or from a CD-ROM, and install it using the Gnome desktop (XXX: details). This is the usual way of working. The RedHat CDs from which the classroom server is installed contain a huge amount of software, not all of which may be installed from the outset.
Users who are not system administrators, and who therefore do not have the right to install software for other users, may still install software locally by compiling it themselves, and installing to their home directory. If they do this, they will need to adjust some environment variables (such as PATH and MANPATH) to include ~/bin and ~/man if they aren't there already. This can be a good way to learn about new software without destabilising the system for other users.
If your tuXlab is fully utilised and well-maintained, the Shuttleworth Foundation may allocate further workstations to it.
No one will know the needs of your community as well as you, and the resources (as far as equipment and available skills are concerned) will vary from school to school. Therefor the following should only be seen as an example of the kinds of possibilities you may explore, and should not limit your thinking.
- Training
tuXlabs primarily fulfill an educational purpose, and so training outside the context of the school's curriculum is an obvious avenue to explore. This can include extra lessons for learners who are curious and want to go beyond computer literacy lessons, or basic skills for those who have trouble keeping up.
In the interests of sustainability, volunteer training is also very important. tuXlabs are installed by volunteers, and rely on volunteers for maintenance and support. The school can recruit them from its community and the parents of learners, so that those who are interested are able to assist in the installation of new tuXlabs.
As part of community outreach, the school can invite interested parents to the tuXlab in order to introduce them to the environment their children are learning to use. Since the tuXlab software is freely available for installation at home, this can empower the parents to learn from their children and put the software to work at home. (XXX: phrasing)
- Time sharing
If there are other groups who need computers for their activities, it may be possible for them to share the lab under supervision.
- School projects
The tuXlab can be used for school projects such as an events calendar or a school newsletter. There is also Open Source software available for libraries, and an enterprising computer club could put the catalog of the school library on the tuXlab network.
- General computer literacy
XXX: "Office" stuff -- Wordprocessing, Spreadsheets, ... Making screenshots Downloading stuff from the internet Organizing your files
Table of Contents
The following may be used as a guideline when drawing up a business plan for your tuXlab. You need to submit a business plan in order to apply for a tuXlab from the Shuttleworth Foundation. Please feel free to add any other information you feel is applicable to the application or business plan.
Please supply some general information about your school.
Background
Mission
Vision
Achievements
What are your plans to promote open source software?
How will lab use be integrated into the school timetable?
What are your plans to involve the community? Please adress issues such as benefits and development opportunities for the community.
What are your plans regarding staff development using the computer lab?
Please provide a statement of needs, including your current computer equipment, if any.
Physical infrastructure --- current infrastructure as well as outstanding requirements (see the section called “tuXlab School Criteria”).
Plan of lab --- i.e. size and layout of room, including measurements (please supply a diagram).
Do you have a Computer Committee already established?
Who is the Facilitator?
Please detail your roll-out strategy: financial plans and actual work in measurable terms
What are the risks involved for you with establishing a lab? Address e.g. financial considerations, burglary as factor, etc.
How will you be addressing possible risks?
What specific opportunities will be created for you if you have a computer lab.
How do you plan to sustain the tuXlab? For example, do you have a network of volunteers, will you be establishing an Internet cafe or service bureau, etc.
What types of skills transfer do you envisage?
Should you require any further assistance please contact:
Casey-Lea Olson
Open Source Project Administrator
Tel. 021 970 1232 |
Fax. 021 970 1233
<casey@shuttleworthfoundation.org>
Schools are selected, and the project implementation initiated, based on fulfilment of the following minimum criteria and expectations.
The School will be required to:
Complete an initial survey activities;
Submit a business plan including its initial plans to introduce the tuXlab into school;
Establish a computer committee;
Ensure that a representative participates in the establishment of two tuXlabs prior to selection, as well as participation in at least two labs post installation;
Identify a room to house the tuXlab;
Secure the room with mesh window bars, safety gates and an alarm;
Ensure that the electrical system is suitable and sufficient electrical points are available;
Install trunking for networking cable;
Provide a cabinet to securely protect server and networking switch;
Install a telephone line for telephonic support and e-mail connectivity;
Ensure that desk space and seating is available;
Ensure participation from the educators and learners during the installation process;
Appoint or employ a facilitator for training and on-site support for a one-year period;
Actively play a role in the successful operation of the cluster unit;
Attend a monthly tuXlab meeting; and
Open the tuXlab at least one Saturday of each month for an "Open day".
Additional criteria may be set for each school.
Based on successful selection, the exact terms of this project will be outlined in a Memorandum of Understanding.
Should you have any further queries with regards to the above requirements, please do not hesitate to contact us.
This book is a real open source project, and in writing it I have incorporated work from a number of other people. Here is a short list in alphabetical order. I'm sure I've missed some people, so please let me know.
Jonathan Carter, for his excellent Troubleshooting Guide.
Jason Hudson, for the outline that started off this book.
Alistair Otter (XXX?) for his tuXlabs book
Andy Rabagliati, for various documents on the http://wizzy.org/ site.
Hilton Theunissen and Casey-Lea Olson, for various policy and operating procedures documents on the http://www.shuttleworthfoundation.org site.
- Asymmetric Digital Subscriber Line (ADSL)
ADSL is a technology for transmitting digital data across normal copper phone lines at high speeds. It is a short-range technology, requiring subscribers to be within a few kilometers of the exchange providing the service. It is called Asymmetric because download speeds are configured to be far higher than upload speeds (you can receive more quickly than you can send).
- Application Programming Interface (API)
Just as a program has a range of menus, icons and buttons with which a user can control it, it can have a set of method calls and data structures that can be used by other programs to control it. This is the API.
- Basic In/Out System (BIOS)
A small program in non-volatile storage that is executed immediately after a computer is powered up. Normally, it passes control to the boot loader of the selected boot media as soon as possible. However, it also displays some diagnostic information while executing, including a prompt to enter configuration mode. While in configuration mode, you may set various basic properties of the computer, such as the time of the system clock and the selected boot media (e.g. CD-ROM, hard disk, or network).
- boot
When a computer is powered up, control immediately passes to the BIOS. The BIOS finds the program code that should be executed to continue the startup process, until the operating system is up and running. The whole procedure is called booting up, from the expression "pulling yourself up by your bootlaces". Picture a cartoon figure on flat land, grabbing hold of his bootlaces and pulling himself up into the air until he's flying. A computer manages something similar, when it changes from an inert lump of plastic to a running system.
- Central Processing Unit (CPU)
The CPU is the core of the computer. It's one of the smaller pieces, consisting of a flat square of silicon, but it contains most of the computer's complexity, in the form of millions of transistors. When the computer is executing programs, all of the instructions as well as the data are fetched from RAM and processed by the CPU.
- Common Gateway Interface (CGI)
This is a specification for calling scripts that are triggered through the web. The CGI standard specifies what data must be passed to the script.
- daemon
A program that runs on a server, waiting for requests and servicing them. The program runs permanently, as long as the service should be offered.
- Document Object Model (DOM)
When a web browser parses an HTML page, it doesn't just write out text to the screen and have done with it. It needs to hold on to the entire structure in order to be able to rewrite it using Javascript, changing parts of the page in-place and reflowing the resulting document immediately. This internal structure is called the Document Object Model. You can read all about it at the World Wide Web Consortium's Document Object Model page.
- Domain Name System (DNS)
The Domain Name System is part of the core infrastructure of the Internet. It consists of a massive globally distributed database that matches IP addresses (e.g. 216.239.57.99) to domain names that humans like to remember (e.g. google.com). As long as they keep to the rules, anyone can run a DNS server to resolve local address and to cache global addresses. No DNS server needs to store all the domain names on earth: the job is distributed among ISPs who each take responsibility for different sections of the namespace. If your local nameserver doesn't know an IP address, it knows who to ask to get an answer.
If DNS is unavailable, all the services that depend on it (such as web browsing and email) don't work.
- Dynamic Host Configuration Protocol (DHCP)
See the section called “Dynamic Host Configuration Protocol”.
- Etherboot
See PXE in the section called “Glossary”.
- Internet Service Provider (ISP)
A business which provides internet access to its customers. The nature of this service may vary widely, from dialup access and email for home users to wireless broadband and website hosting for big media companies and everything in between.
- platform independence
A platform is a short name for the entire software environment which a specific program requires in order to run. Programs may target an operating system (the Windows, Linux or Macintosh platforms), or a virtual machine (the Java platform, which is available across operating systems). Increasingly, web applications such as Google's Gmail email service target the web browser as platform.
When a program is capable of being run on many different platforms, it is called cross-platform. In this case, it either needs to be rather self-contained, not making use of any special capabilities of any specific platform, or it needs to contain alternative implementations for all the platforms it caters for.
- Power On Self Test (POST)
The POST is a series of hardcoded self-tests that a computer's BIOS performs to see whether basic resources such as its CPU, memory, and keyboard are present and functional.
- Pre-boot eXecution Environment (PXE)
A small program on the network card that allows a computer to boot from the network. The PXE takes care of finding a server from which to boot, and transferring the boot loader from the server to the client across the network.
- Programmable ROM (PROM)
This is a kind of memory that can be written exactly once. After it's been written, its contents is fixed. It's generally used for things like network cards with the facility to boot from the network. Such cards can be used in many different environments, requiring different software. However, once deployed in some environment, it normally stays there. Therefor the required software can be written to a PROM on the card, effectively locking down the card to the deployed environment.
- Media Access Control address (MAC address)
In computer networking, a MAC address is a code on most forms of networking equipment that allows for that device to be uniquely identified.
- Network File System (NFS)
A local filesystem reads data from a hard disk. NFS is a protocol that allows a remote filesystem to be mounted on a path of the local filesystem, so that data read from files on that path is not read from a local disk, but from a server on the network.
- netmask
In the section called “TCP/IP” networking, the netmask specifies all the IP addresses that belong to a particular network.
- RAM disk
A physical hard disk stores data on magnetic platters. A RAM disk emulates a hard disk using the computer's memory. Whereas a hard disk stores data permanently until it is rewritten, a RAM disk only exists as a running program, and goes away when the program stops or the computer is powered down.
- Random Access Memory (RAM)
Memory that stores code and data only as long as the computer is powered up. At the first hint of a power interruption, RAM becomes as blank as a beach washed clean by the tide. RAM can be written to, and during execution, programs are continuously rewriting its contents.
- Read Only Memory (ROM)
Memory that stores code and data permanently, whether or not the workstation is powered up. It cannot be written to: every time it's read, it's exactly the same.
- Read the FINE Manual (RTFM)
Linux is a self-documenting system. All Linux programs come with technical documentation, and most commands accept a --help option that will start you off. The information is sometimes cryptic, or just very dense, but if you don't read it two, three, four or five times, you'll find yourself asking the same questions again and again, and never progressing beyond the basics.
You'll also find that people answer your questions with a terse "RTFM!", meaning that the answer is right there in the manual. Don't take offense, look it up.
- root
Linux systems loosely use a tree metaphor to explain some aspects of their structure. So, for example, the user who is the system administrator, with all privileges to make or break the system, is the root user. The root user can create other users and groups with more limited privileges, like the branches of a tree that are separate and thinner than the trunk.
- root filesystem
The filesystem is an hierarchical tree structure. The directory which contains all the others is called the root, and is written like this: /. This is a subdirectory of the root directory: /etc. This is a file in that subdirectory: /etc/hosts.
- shell
Another metaphor used to express the structure of a Linux system is that of a nut containing a kernel. The kernel is hidden inside, it is surrounded by a shell. As user you can't interact with the kernel directly, you interact with a shell program. This is a program which accepts commands and gives feedback, all via a textual commandline interface. The shell has a number of builtin commands, but it also does job control, starting and stopping programs that run under its control.
The shell has a full complement of flow control structures, so that it can be used to write programs. These are called shell scripts. Shell scripts are most often used to coordinate the execution of other programs.
- Simple Mail Transfer Protocol (SMTP)
When you send an email, your mail server looks at the headers of the mail to see where it should be delivered. It then uses DNS to look up the IP address of the mail server on the receiving end. When it knows whom to contact, it starts an SMTP conversation with the remote mailserver. It asks the server what version of the protocol it supports (so that it knows how to encode the mail, if necessary) and whether the server is accepting mail for the user you want to reach. When the two servers have gotten to know one another, the mail is transfered and queued for the remote user to read.
- symbolic links
A file can only be stored in one place on a disk. If you want it to appear to be in other places as well, you can make a symbolic link from there to the real location of the file. By most commands, the link will be transparent: it will be treated exactly as though the file really exists in that location.